If you are new here, don’t forget to check our Discord Channel. It’s free for everyone!
This is the first out of three parts of the Hardneed Scales primer. If you are new to the deck and want to learn more about the basics, check other parts of the primer and the sideboard guide- you can find it here.
Hello, I’m Stan, aka LordEgg on MTGO. I’ve been playing Hardened Scales since 2018, and have seen quite a bit of success with it. From a top 8 finish at GP Birmingham 2019, another top 8 at MKM series Gent in 2019, to multiple online challenge top 8s. Before Hardened Scales I was an Affinity player, so my experience with Arcbound Ravager in Modern is now coming up on 10 years.
General concept of the archetype
What is Hardened Scales?
Hardened Scales at its core is a deck based around putting +1/+1 counters on artifact creatures, and using the synergy between them to assemble either a game-winning combo (large Walking Ballista/Inkmoth Nexus) or an insurmountable boardstate (big Patchwork Automaton backed up with Welding Jar/a high amount of 1/1 Thopters that can all be made into lethal threats).
Hardened Scales has received many new cards these last few years, and what’s left of its earlier successful iterations is only the absolute core of the deck.
A typical decklist:
If you want to get a downloadable version, click here.
Why is it good? What is the best metagame for this deck?
Hardened Scales thrives in a metagame consisting of mainly damage or destruction-based, one for one removal. Cards like Hangarback Walker, Patchwork Automaton, and Welding Jar match up incredibly well against Fatal Push, Lightning Bolt, and Unholy Heat. To a lesser extent, even cards like Flame of Anor, Prismari Command, and Kolaghan’s Command are manageable, as they place a high burden on our opponents’ mana to deal with our threats.
Creature strategies (i.e. Merfolk, Humans, Goblins) are also generally good matchups for the deck, as being able to build up your boardstate uninterrupted can quickly lead to an unbeatable Walking Ballista to control their board, or an Inkmoth Nexus kill. These decks have fallen off in Modern in recent years, but you will still encounter them from time to time.
Burn is also an important mention, as this is probably the deck’s best matchup in the format. Being one of the few decks that take zero damage from its own manabase is already a great start, and the way we match up against their removal and creatures makes them need an incredibly good draw to have a chance. Not to mention the ability to gain life from both mainboard (Shadowspear, Basilisk Collar) and sideboard (Nature’s Claim, Tamiyo’s Safekeeping) cards.
The deck is most characterised by its resilience and consistency, especially with the recent addition of Agatha’s Soul Cauldron. You have a massive amount of redundancy for your powerful effects, and without specific sideboard cards, it can be very difficult to completely shut the deck off.
It is also likely the most difficult deck in modern to play against, as finding the correct time and target for your pieces of removal requires intimate familiarity with the deck’s lines and interactions. This can lead to a high amount of wins from positions where you should have lost, mainly against decks like Murktide, Scam, and UWx Control.
What are the deck’s biggest weaknesses?
Where Hardened Scales perform best against interactive red and black decks, it does worst against non-interactive combo decks (Amulet, Storm, Yawgmoth) that tend to go off one turn earlier. Hardened Scales can consistently goldfish turn four kills that are often resilient to removal. This does not matter against a turn three Primeval Titan or Yawgmoth, which are excellent at preventing our deck from going off, before winning on the next turn themselves.
Recently, decks based around The One Ring have also been tough matchups, although not as much as the aforementioned decks. The card advantage provided makes any game against it nearly impossible to win if it ends up continuing for multiple turns, and the protection nearly always guarantees at least one of those turns.
Exile-based removal can also be a significant problem, especially now that Agatha’s Soul Cauldron makes having our creatures in the graveyard more relevant than ever before. Against decks running Leyline Binding and Prismatic Ending, always try and see if it’s possible to have either a Ravager, or the red mana to activate a Zabaz to destroy your own Hangarback/Zabaz in response to the exile, to still get your death trigger, as well as the creature in the graveyard.
The biggest weakness the deck has construction-wise is its overabundance of two drops, and lack of maindeck interaction. Every version of the deck plays at least nineteen two mana cards, with many going up to as much as twenty or even twenty one – this can make it hard to curve out at times if you do not reach the crucial fourth land on turn four to enable double spelling. Its lack of interaction in the main outside of Ballista also means that any combo deck that doesn’t care about the card tends to outspeed us easily.
Maindeck – analysis card by card
Enablers
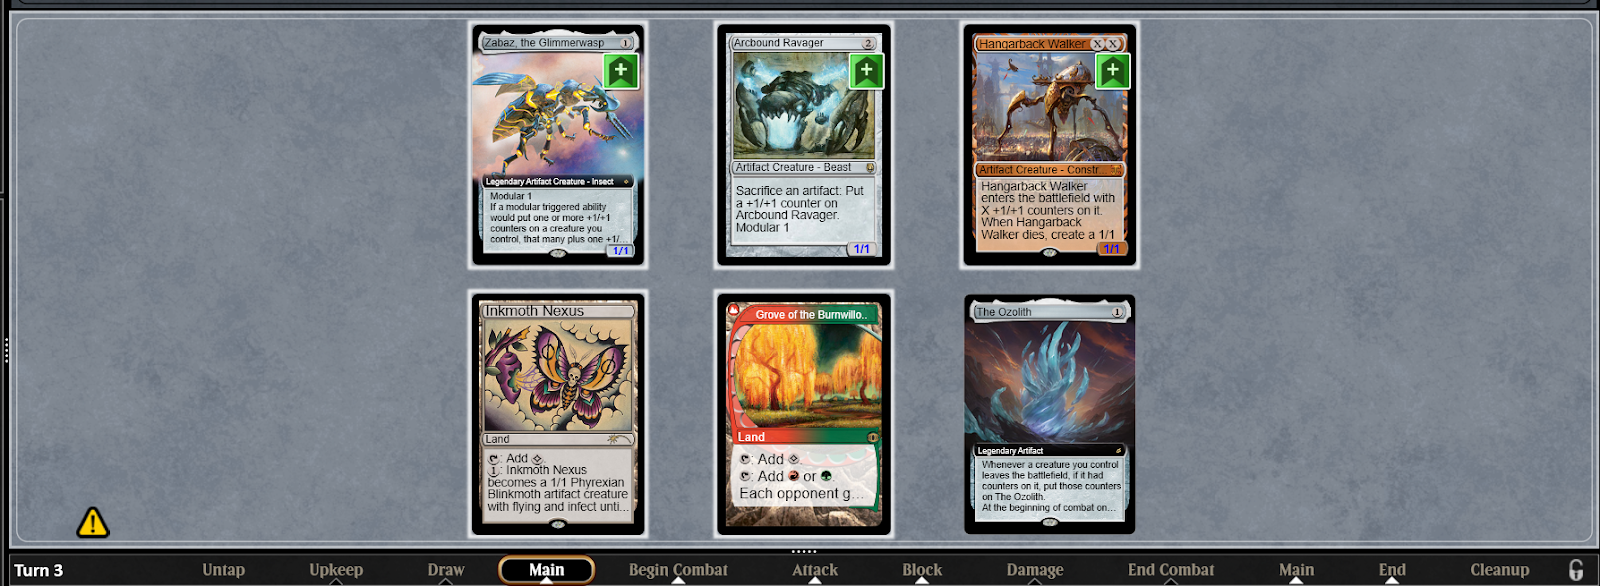
Hardened Scales

The eponymous card the deck is named after, Hardened Scales is easily our strongest turn one play, and therefore our best enabler, leading to the quickest kills and strongest boardstates for the least amount of mana.
What the card does is whenever one of your creatures receives a +1/+1 counter from any source, it gets a single additional counter. This causes every creature (besides Patchwork Automaton) to come into play with two counters instead of one, and every single time counters move, to add an additional counter as well. This gets out of hand incredibly quickly, as for example:
An Arcbound Ravager sacrificing a Zabaz without Scales in play would yield a total of three counters on the Ravager, one from itself coming into play, one from its ability to sacrifice an artifact to receive a counter, and another from Zabaz’s modular trigger. With Hardened Scales in play, it would grant a total of seven instead. Two from the Ravager being played, another two from it sacrificing an artifact, and Zabaz’s modular trigger granting three (two from the counters it came in with, and the additional from Scales).
This means making sure that counters move as often as possible is key to maximising your total amount of counters you can use in the end, as every time you move counters from one modular creature to another, an additional counter is added. You generally want to keep Ravager alive until the end, with the last ‘’movement’’ of counters targeting a Hangarback Walker, as each counter will create a 1/1 Thopter which can then be sacrificed to the Ravager again, yielding the most amount of counters, which can then be moved to either an Inkmoth, Ballista, or Zabaz with flying to secure the win.
The card works decently well in multiples, it is important to remember that Hardened Scales does not multiply, it adds. So any additional copies of the card will just add another counter to any of the aforementioned steps. The Ravager + Zabaz example would lead to a total of eleven counters (three from Ravager, three from sacrificing, five from modular).
Importantly Hardened Scales effect is not a trigger, but a replacement effect, an opponent cannot deal one damage to your creature in between it entering and receiving the extra counter from Hardened Scales.
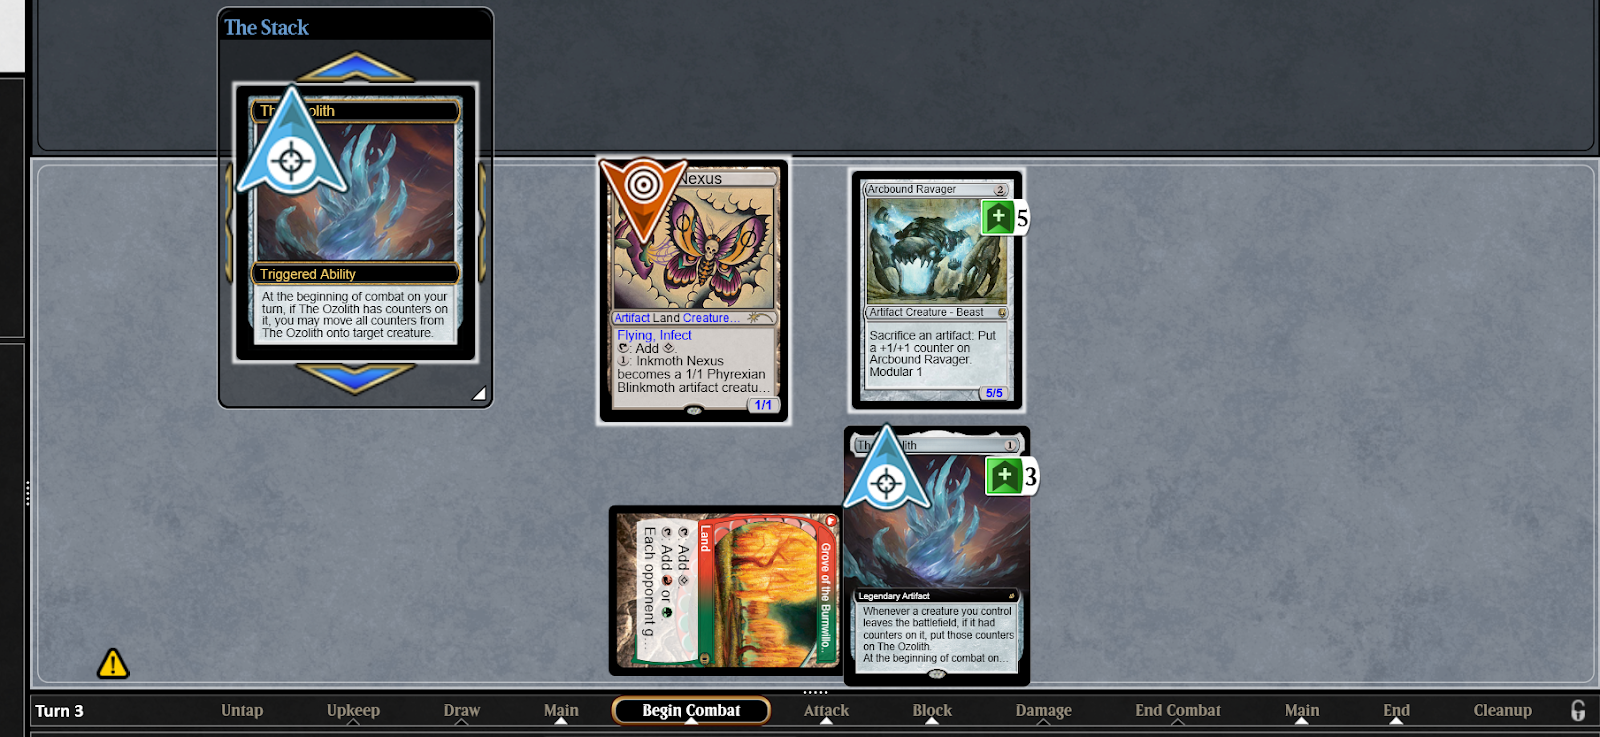
The Ozolith

The Ozolith is a relatively recent addition, coming into the format together with companions in 2020, it was immediately seen as a great addition to the Scales deck, which was faltering at the time due to the banning of Mox Opal.
This card is a very important piece of a large portion of your combo kills, as it functions as another ‘’duplicator’’ for counters while being fetchable by Urza’s Saga. Get used to looking for Ozolith kill lines whenever you have a Saga ticking up to its 3rd chapter.
Whenever any of your creatures leave the battlefield for any reason (exile, bounce, destruction, sacrifice), all the counters on it will be moved onto The Ozolith (importantly, this includes -1/-1 counters! Make sure to track this properly when playing against decks running Yawgmoth and Soul-Scar Mage.) Then during the beginning of combat on your turn, you must target a creature (can be your opponents) which you may then choose to receive the counters. This lets you easily split up the counters from a large Ravager onto two different threats, to protect from removal, or double up on the counters it grants where it otherwise would not have been enough for a kill.
For example, with Hardened scales, The Ozolith, an Arcbound Ravager, and a Welding Jar out, you can make an 11/11 Inkmoth Nexus to attack your opponent with: The Ravager enters with two counters, it then sacrifices the Welding Jar for an additional two counters bringing it up to four. You then activate the Nexus to make it a creature, and sacrifice the Ravager to itself. The modular trigger targets the Nexus, granting it five counters thanks to Hardened Scales. At the same time, The Ozolith receives four counters from the Ravager (remember, it’s not a creature and therefore does not benefit from Hardened Scales). You then move to the beginning of combat, where the counters from The Ozolith will move to Inkmoth Nexus, giving it an additional five to bring it up to 11/11.
Ozolith also matches up excellently against opposing removal spells, ensuring that any creature drawn will be a threat for your opponent they need to answer. This means they likely have to kill The Ozolith before anything else, which can be very tough for decks not running generic removal like Prismatic Ending or Leyline Binding.
Once you start ‘’bouncing’’ around counters using Arcbound Ravager with other modular creatures, The Ozolith will also grow to a high amount of counters very quickly, allowing you a variety of ways to win the game. A 20/20 Walking Ballista to win without attacking, or a very large Hangarback Walker you can sacrifice at the end step of your opponent’s next turn to make an army of Thopters that can’t be answered without Engineered Explosives or a similar card are somewhat common occurrences once you get going.
It also lets you play around damage based removal quite easily, when building a large Inkmoth/Ballista, don’t sacrifice everything precombat to make it as big as possible, look to see how many counters you need exactly, then split them up to have the ability to sacrifice the Ravager to itself at any time to place additional counters on your winning creature at instant speed, example:
Sacrifice the Zabaz targeting the Hangarback, then sacrifice the Hangarback and all the Thopters that come out of it.
Animate the Nexus and target it with The Ozolith counters, this will protect it from a Lightning Bolt/Lava Dart/Unholy Heat (without delirium). If your opponent does not respond, you can then sacrifice the Ozolith to the Ravager bringing it to six counters, before sacrificing it to itself for exactly ten on the Inkmoth. If your opponent does respond with a Lightning Bolt, sacrifice the Ravager to itself, this will trigger the Ozolith again, and your Inkmoth will have thirteen counters at the end.
When using The Ozolith to set up an Inkmoth Nexus kill, activate your Inkmoth in your main phase, or The Ozolith will not see it as a potential target.

The counters on The Ozolith cannot ‘’disappear’’ by removing its target in response to the trigger. This will merely make the trigger fizzle and leave the counters for your next turn. If an opponent wants to respond to The Ozolith this should be done with the trigger on the stack, as destroying a creature in your main phase will just let you pick a different target once you enter combat.
Ozolith, the Shattered Spire

Another new addition to the deck. Ozolith, the Shattered Spire (nicknamed Gozo) functions as additional (if worse) copies of the Hardened Scales effect, therefore most things that apply to Scales also apply to this, with a few exceptions I’ll go over.
It has a few differences to Scales, besides the obvious mana cost making it significantly harder to fit into your curve. Mainly its activated ability, this can be an additional source of counters for when you are running low on resources and high on mana. When casting an XX creature like a Hangarback Walker or Walking Ballista, it’s better to cast them for only X=1 with a Gozo out, and then activate its ability to place an additional counter on it, leading to a total count of four instead of three.
It also has decent synergy with manlands, which already dodge White’s exile based removal (except for March of Otherworldly Light), as placing two counters on an Inkmoth Nexus and attacking with it every turn leads to a surprisingly fast clock, especially with additional copies of either the land or Hardened Scales.
When you’re flooded out with a Gozo in play, try to always look for something to use the activated ability on.
Its other new ability is that it has cycling two, this comes up very rarely, but is something to keep in mind if you happen to draw multiples and are flooding out, or are desperately looking for a single card to save the game.
The only real other ‘’trick’’ the card has over regular Hardened Scales, is how it interacts with the original Ozolith. If you read carefully, you’ll see that Gozo does in fact read ‘’If one or more +1/+1 counters would be placed on an artifact or creature you control’’ which means that it amplifies the +1/+1 counters received by the original Ozolith, as well as your creatures. This also means that whenever you activate its ability with an original Ozolith on the field, it’s often better to target the Ozolith, which lets you place a total of three counters on a creature you control at the beginning of combat, rather than just the two if you had directly targeted the creature (this does not apply if the Ozolith already has counters on it).
All in all the card is valuable in that it’s an additional copy of the most important effect in the deck, but copies have been getting cut recently as slots for two drops are very much limited.
Urza’s Saga
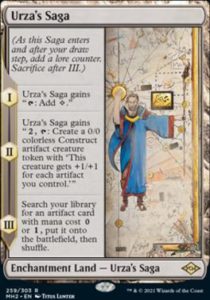
Urza’s Saga is one of the two new inclusions to the deck from MH2, and the more powerful of the two. Everyone who plays Modern even fleetingly should be very familiar with the card and what it can do, and in Scales this is no different. It grinds people out with constructs, fetches up key pieces to make combos possible, protect them, or shut down our opponents plan.
Generally you should be looking to play it on turn two, to keep open the possibility of a turn three Construct, and look for a turn four kill by fetching either an Ozolith or Zabaz. Sometimes, however, a turn one Saga is desirable, if your hand is looking like it could have a particularly explosive turn three, or the matchup demands it. It can even be optimal to play it on turn three at times, when you have an opening hand based around Patchwork Automaton, and really want to spend early turns casting artifacts to grow it, but this typically only goes for very grindy matchups where it’s important that you make constructs.
Always be aware of what exactly you are able to grab with its third chapter, between Haywire Mite, Pithing Needle, Grafdigger’s Cage, Relic of Progenitus, and more, a wide variety of strong sideboard hate pieces can be fetched. Know what you sideboarded before searching, and if necessary just look at your sideboard during the game before searching.
As with all Urza’s Saga decks, but more so with Scales, be very wary of Dress Down, the card not only kills any construct tokens you’ve made, but also functions as a counterspell for any of your XX or modular creatures, as they lose the ability to enter with counters. Dress Down can be prevented from killing your construct tokens, by placing a +1/+1 counter on them before it resolves, keep this option in mind to save them as a large enough construct is very hard for most Dress Down decks to deal with.
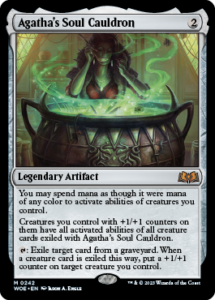
Agatha’s Soul Cauldron
The newest addition to the deck, and the reason it’s been on the rise again recently, Agatha’s Soul Cauldron is an incredible card that is well worth the slot. The lines this card opens up are incredibly wide, mainly involving placing either Walking Ballista or Arcbound Ravager under it, enabling a variety of possible kills.
Cauldron lets you exile a card from any graveyard by tapping it, and then place a +1/+1 counter on one of your creatures if you’ve exiled a creature this way. This by itself is already a decent source of +1/+1 counters mixed with graveyard hate for decks like Living End and Scam. Its best ability, however, is the second line of text, which makes any of your creatures with a +1/+1 counter share the abilities with all creatures you have exiled with Cauldron. This primarily lets you share the Ravager or Ballista ability with all your creatures, making it very easy to win from there most of the time. The other two creatures with activated abilities are less common but still quite useful. Exiling Zabaz lets you use any mana to either destroy one of your own artifacts, or grant the creature flying to get over blockers. Hangarback Walker lets you slowly build up counters on any of your creatures for a long grindy game.
When you have a Cauldron in play, it’s often optimal to cast a Walking Ballista for X=0 just to get it in the graveyard and immediately exile it with the Cauldron, granting the ability to all of your creatures. For example, one of your strongest opening lines is to cast Hardened Scales on turn one, Patchwork Automaton on turn two, and then Cauldron on turn three, followed by a zero mana Ballista which you then exile. This leaves you with a 7/7 Patchwork Automaton with the Ballista ability that can attack.
There are a lot of other nice tricks you can do. I wrote down a few of them:
- In your sideboard, there’s Haywire Mite which you can exile to keep opposing Urza’s Saga based decks under control. Hammer for example can nearly never beat this.
- Any creature with the Walking Ballista ability essentially has double strike, as you can attack your opponent, and then remove all counters postcombat to deal the same damage to them again. Remember this especially when using Inkmoth Nexus in combination with the Cauldron (having exiled Ballista), as you only need five counters on an Inkmoth in order to kill your opponent with it.
- The graveyard hate function of the Cauldron is also quite useful, making it your best turn two play against decks like Living End or Reanimator. It also prevents any attempt of Scam to reanimate after turn two, which greatly reduces the usefulness of Fury against you.
- Of course against decks playing Urza or Yawgmoth, exiling the namesake card is going to grant your creatures their very powerful abilities as well, so make sure to always be on the lookout for opposing activated abilities that are worth stealing.
- It also easily lets you get around Pithing Needle like effects, as a Needle naming Ravager or Ballista does not affect other creatures with the same ability.
Creatures
Arcbound Ravager

The oldest and probably most iconic card in the deck, Ravager has been terrorising people with its ability to enable kills out of nowhere since 2004, and it probably does this the most in the current versions of Scales.
At the absolute base level the card is a 2 mana 1/1 that allows you to sacrifice artifacts to give it a single +1/+1 counter each time, when it dies it moves all of its counters to another artifact creature. It can sacrifice itself, which is a huge part of what makes the card good.
Ravager is the ‘’glue’’ of the deck that really lets it function best by:
- Letting you move counters to get around removal;
- Sacrificing other modular creatures and Hangarback walkers for instant speed interaction;
- Moving all your counters onto a ballista or inkmoth to set up a win;
- And much more.
Ravager is generally not the creature you want to cast on turn 2, as it’s most vulnerable to removal, and least valuable as an engine at that point. It shines in combination with all the other pieces in your deck, letting you ‘’save’’ any counters from opposing removal, and possibly protect a threat like Ballista, Inkmoth, or Patchwork by sacrificing the Ravager itself.
Try and always look for ways to kill your opponent once you have a Ravager on board, as with either an Inkmoth without summoning sickness in play, or a Ballista in hand, it can be surprising just how easy it can be to get lethal attack in.
Nearly everything the deck does can be performed at instant speed, so learn to be patient when necessary! A Ravager next to a bunch of other artifact creatures is a threat that is hard to navigate, as opposed to a couple of large creatures. Unless you are sure your opponent is shields down, or you won’t be able to win if they can untap, it’s generally best to wait with your Ravager related plays. This does change if you need to utilise The Ozolith, as its ability only triggers at the beginning of your combat. Cauldron also lets you potentially spread the Ravager ability across all your creatures, although it’s important to realise that only Zabaz can move its own counters, all your other creatures do not have the modular ability that lets them do so.
Ravager is often the card that will make you think ‘’If only I had a Ravager here, I could win from this position’’ and is therefore a prime target to grab with Ancient Stirrings in the later turns, as it enables all your best lines.
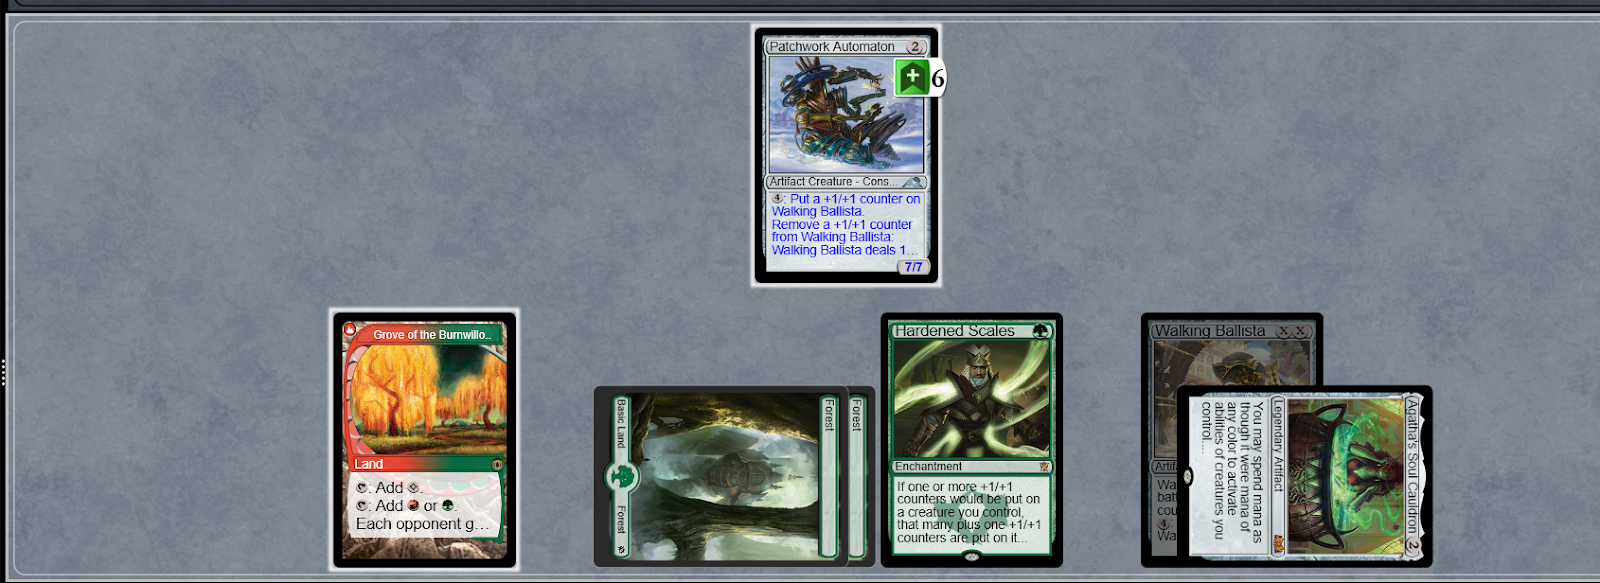
Patchwork Automaton
Patchwork is another recent addition, coming from Kamigawa: Neon Dynasty.
The primary ability that makes Patchwork so excellent is the ward, as this makes it your safest turn 2 play by far against interactive decks, since the chance that they’ll be able to kill it efficiently is nearly zero. It’s safe from Wrenn and Six, Orcish Bowmasters, and even 1 mana removal as long as you’re on the play, making it all but guaranteed that you’ll get to untap with it.
It’s the only creature in the deck that does not enter with any counters, but this is thankfully remedied by its incredibly powerful ability to get a +1/+1 counter whenever you cast an artifact spell. Do remember this specifically triggers on cast, and not on any artifact entering the battlefield, meaning Urza’s Sagas third chapter and Hangarbacks death trigger will not add additional counters to your Patchwork. On the other hand, you will still receive the +1/+1 counter if the spell is countered.
Patchwork is a great recipient of Agatha’s Soul Cauldron, thanks to its ward and ability to grow itself quickly. The earlier shown line of turn 1 Scales, turn 2 Patchwork, turn 3 Cauldron + Ballista being a particularly powerful example of this.
Its best use is obviously in interactive matchups, where it provides a fast growing and hard to remove threat to any deck trying to trade cards 1 for 1, especially backed up with Welding Jar, which it has excellent synergy with to start.
Where it becomes less useful are the fast combo matchups and, to a lesser extent, creature decks. You will often find yourself boarding it out against the likes of Yawgmoth, Amulet, and Tron, where its protection isn’t as relevant and you just need to win as quickly as possible, or lock the opponent out of the game with a well-placed hate piece. It can still have some game 1 value in these matchups however, so don’t be too afraid to cast it, as it can be an excellent source of counters for an Ozolith, giving it a way to move its counters when combined with an Arcbound Ravager to look for combo kills.
Hangarback Walker

Hangarback Walker hails from Magic Origins, and is our other resilient turn 2 creature. It can be cast for XX, coming in with a single +1/+1 counter for every 2 mana spent. When it dies it makes an amount of 1/1 flying Thopters equal to the +1/+1 counters on it, and you can spend 1 mana to tap it and put a +1/+1 counter on it. This all makes it a great threat against midrange strategies, as they generally don’t want you to grow the Hangarback with its last ability,and kill it early. You will still be left with a 1/1 Thopter to use later in that case. Of course the card only gets better with a Hardened Scales effect in play.
It serves an interesting purpose in the deck. Its primary use is the ‘’storing’’ of counters, by virtue of being very inconvenient to remove for opponents not using exile-based removal. It’s often brought out early, and then later sacrificed by an Arcbound Ravager to fuel a combo kill. Another important use is being one of the ways to kill a resolved Karn, The Great Creator. Sacrificing a Hangarback in response to the planeswalker being cast can let you make enough Thopters to kill it on your turn, and unlock your activated abilities again.
When comboing off, it’s the best recipient of the second to last round of counters, once you’ve sacrificed all your extra copies of Zabaz and Arcbound Ravager. You place all the counters onto the Hangarback Walker, then sacrifice it to Arcbound Ravager. This creates a large amount of Thopters which you can then sacrifice again for even more counters.
Another thing to note is its weakness to Archmage’s Charm. Any deck running it is very likely to choose an unprotected Hangarback as the primary target, and this is often quite backbreaking. Having one of your Saga tokens stolen is not a large issue, as it will be a 1/1 or 2/2 at most. Hangarback however can still be grown with its ability, and creatures even more chump blockers when it dies. This often buys your opponent between 2-3 turns of blocking depending on the size of the Hangarback, and can sometimes even present a lethal threat to you. With that in mind, keep trying to prioritise having either a Zabaz, Ravager, or similar effect available whenever you play a Hangarback against these decks.
Zabaz, the Glimmerwasp

Zabaz is the other card added in MH2, being mostly a glorified Arcbound Worker, although it does have its upsides compared to that card. As with Arcbound Worker, it is a 1 mana artifact creature with modular 1, making it come in with a +1/+1 counter and move all of its counters to another artifact creature when it dies. However, it comes with a static ability, and two activated ones. Its first ability is often misunderstood, and reads:
‘’If a modular triggered ability would put one or more +1/+1 counters on a creature you control, that many plus one +1/+1 counters are put on it instead’’
This means that whenever one of your modular creatures dies, it will move an additional counter in the same way that hardened scales does. This does not apply to the counters that modular creatures enter the battlefield with, as those are replacement effects, not triggered abilities.
A good example of this is casting a turn 1 Hardened Scales, followed up by 2 copies of Zabaz on your 2nd turn, will end up with a single 6/6 Zabaz, due to the static abilities of both Hardened scales and Zabaz adding a counter to the modular trigger.

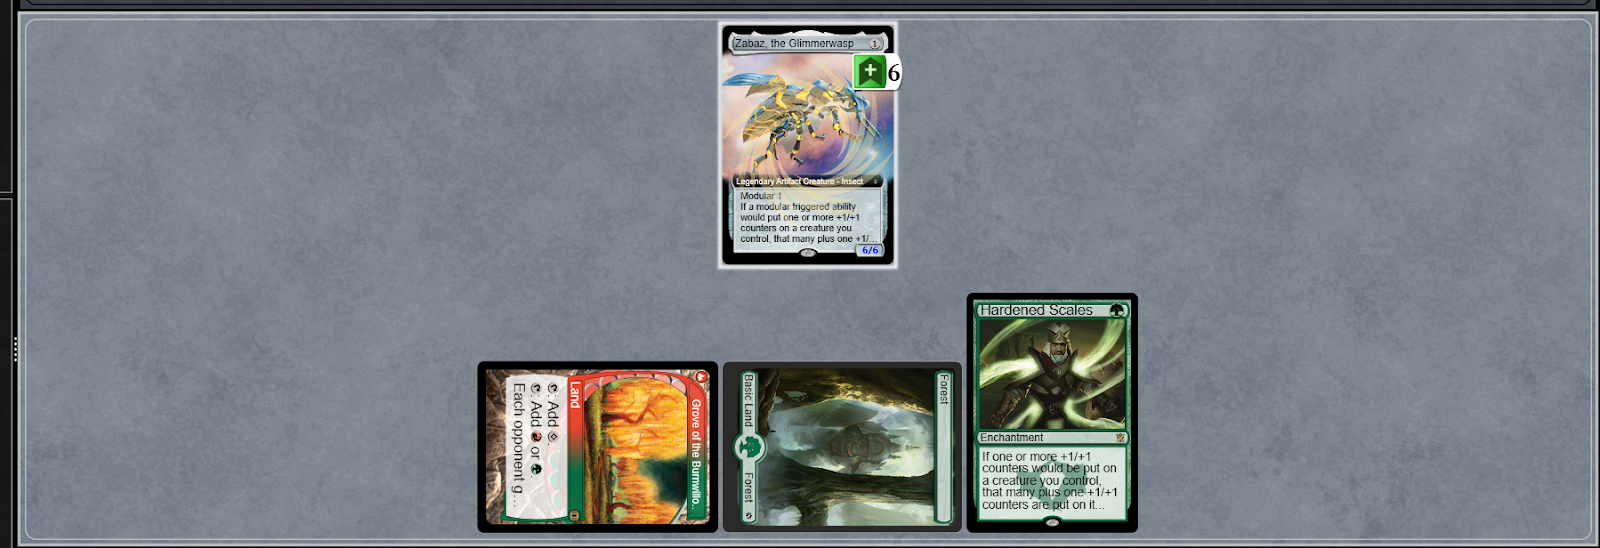
This is of course because Zabaz is legendary, which is generally an upside in the deck, allowing for another way to have a creature die and move counters to more important targets and make use of your Ozolith.
Its other 2 abilities are also quite useful, especially now with Cauldron allowing mana of any colour to be used to activate them.
Its first activated ability allows you to destroy any artifact you control for 1 red mana. This is a worse version of Arcbound Ravagers ability to sacrifice artifacts. It’s still a good ability to have access too, and the reason the most common versions of the deck run a significant amount of lands that can produce red mana. It lets you blow up any creature with a death trigger (modular or Hangarback) in response to exile-based removal, or even destroy a Patchwork so its counters can be moved to the Ozolith. Zabaz can of course destroy itself, which is most commonly used to either save a more important creature like Walking Ballista, or move the counters to make it able to kill one of your opponents threats.
Its second activated ability grants it flying for a single white mana. This is significantly less useful on Zabaz itself, but has become more common to use since the printing of Cauldron, which can exile Zabaz to give flying to any of your creatures, letting you get a 10/10 Ballista past an opponent’s blockers.
Walking Ballista
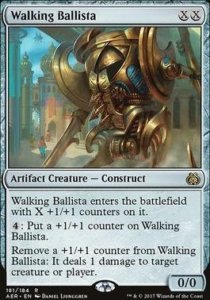
Where Ravager is the ultimate enabler for the deck, Walking Ballista is the ultimate payoff. It’s also the decks only real form of mainboard interaction with most strategies, letting you ping off crucial manadorks, Ragavan’s, Dauthi Voidwalkers, and anything that is trying to equip a Hammer. Against a lot of creature decks in game 1, building a Walking Ballista that is 6/6 or bigger will just straight up win you the game, as they are prevented from playing creatures for at least 2 turns. This is your main plan against Hammer and Yawgmoth.
Ballista is part of by far your most combo kills. Once you can attack with it, thanks to its pseudo-double strike you only need 10 counters to kill an opponent, often less thanks to fetchland manabases.
It is generally not the creature you want to play on turn two, as it is the least protected from removal out of any of your creatures. Wrenn and Six, and Orcish Bowmasters are particularly brutal ways to lose your turn two Ballista, and it provides the least value if killed, most of the time just doing one or two damage to your opponent. In noninteractive matchups however, you do want to play it early, to make sure it doesn’t have summoning sickness and can attack your opponent as soon as possible.
Even though ballista is your most potent threat for ending the game, it can often be correct to trade it off in certain matchups. Trading Ballista for Dauthi Voidwalker is one of the best things you can do in the Scam matchup, as the card completely breaks our ability to use death triggers and the newly added Cauldron. A similarly good trade is with a Dragon’s Rage Channeler out of Murktide or Prowess decks, this card provides so much value and becomes significantly harder to kill once delirium is active. It might not seem intuitive, but this trade is worth it most of the time.
Once you have a Hardened Scales and Ballista in play, always be on the lookout for ways to kill your opponent, as they are easier than you might think. It’s key to learn which combination of cards can generally lead to kills, as this is likely the largest edge you will have over your opponents playing Scales. The deck is very unpredictable for anyone who hasn’t spent a lot of time playing it themselves.
Its ability to remove counters to deal damage is of course the primary attraction to the card, but being able to pay 4 mana to place a counter on it is also more useful than you might think. With a Scales effect in play, this nets you 2 counters per use, which translates to essentially casting a free Fire every turn, and can be absolutely backbreaking for opponents on creature decks. When resources are low it’s also a great way to spend extra mana, as a Ballista that gets a counter every turn (due to its pseudo-double strike) quickly turns into a lethal threat against most opponents.
Silver bullets and support cards
Welding Jar

Welding Jar has been waning in popularity lately, as the rise of white exiling removal does weaken the card. However its synergy with Patchwork Automaton is just too hard to ignore, as this creates some of your most protected starts against interactive decks, while still providing you with a strong threat.
Jar is at its best against decks like Murktide, Scam, Burn, and Death’s Shadow variants, where it nearly always trades up in mana, and often lets you untap with game winning creatures (or protect an important Shadowspear).
Do take note of the exact wording of regenerate, as this has become an outdated keyword and comes with some less than stellar quirks. It reads; ‘’The next time this permanent would be destroyed this turn, instead remove all damage from it, tap it, and remove it from combat’’. Now this of course means that anything that you regenerate during combat is no longer attacking, it also lets our opponents remove blockers for lethal attacks even if we have protection in the form of a Welding Jar. Additionally it matches up poorly against removal like Terminate, and Damnation, which still carry the old ‘’Can’t be regenerated’’ text. In more fringe cases, it can force a card like Agatha’s Soul Cauldron to tap, in order to prevent an important graveyard exile being left open.
It’s smart to keep your Welding Jars in hand as long as possible sometimes, you might draw a Patchwork that can make use of the cast trigger, or even when you already have a Patchwork, but it’s under no threat (do make sure your opponent has absolutely no cards that can kill it and would be prevented by Welding Jar here, generally only works turn 2 on the play), you can wait to see if you draw a multiplying effect for an extra counter. Waiting also messes with your opponents expectations for what they can remove, and might force them to pull the trigger earlier than they would have otherwise, opening up your options.
Welding Jar is also a rare but useful find from an Urza’s Saga, mostly used to either protect a hate card like Grafdigger’s cage or Pithing Needle. It can also be useful once your opponent has an Engineered Explosives on board, allowing you to save one of your creatures, this works similarly when you are nearly sure your opponent is about to cast a Supreme Verdict. Lastly it can be a good grab from Saga’s third chapter if you are easily able to combo kill, but are lacking protection against single open mana from a red or black opponent. Do keep in mind if they have the removal here, you will likely not be able to attack.
A fun trick with Welding Jar is specific to the Creativity matchup, they use generally use 3 different tokens to attempt their combo: 1/1 Dwarves created by Dwarven Mine, 2/2 Goblin Shamans created by Fable of the Mirror-Breaker and Treasure tokens created by either the previous token, or Prismari Command
Now, the exact wording on Indomitable Creativity has an important part to it, ‘’For each permanent destroyed this way’’ This means that if the permanent is not destroyed, then creativity has no effect, and wouldn’t you know it? Regeneration from the Welding Jar prevents this destruction (similar to how Hammer Time can use Blacksmith’s Skill), therefore blanking any Creativity cast on treasures. Combined with Walking Ballista to keep the creature under control, this can be a way to completely prevent the Creativity combo on board.
Ancient Stirrings
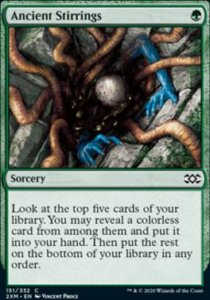
Stirrings, once called ‘’the best cantrip in modern’’ it now really only gets cast in Tron and Scales. Still though, the card is very good, it looks a massive five cards deep, and gets you all of your best cards, besides the namesake card itself. Stirrings’ best use case is either getting an Urza’s Saga in matchups where it shines, a Patchwork if cast turn one, a sideboard hate card, or whichever card you need to combo kill that turn (most often Ravager or Ballista).
Generally I think the card is weaker when played turn one, as when on the play you don’t know what you need in the matchup (the turn two patchwork might look great until your opponent casts an Amulet of Vigor turn one for example), and it doesn’t setup your board to be stronger at all. Still it’s acceptable, and Urza’s Saga is just that good of a card that it can still be worth it.
I personally believe you should be playing 3 copies of Ancient Stirrings with 23 lands, although many people have found success with 4 copies and 22, or 4 and 23. When you are forced to cast Stirrings to find a land, and you do not find an Urza’s Saga it’s very weak, and this shouldn’t be a play you’re making often. Keeping an otherwise strong 1-lander on the play, and fixing it with a turn 1 Stirrings for a land, is perfectly fine however.
Shadowspear/Basilisk Collar
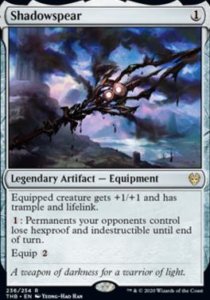

Shadowspear and Collar, these two serve a very similar purpose and are never in the same 75, so they share a slot. I currently prefer playing a single copy in the mainboard, as the metagame at this time has both Scam and Burn as very commonly played matchups, but things can change as the metagame shifts and develops.
Spears main purpose is putting you over the edge in racing situations, a Shadowspear equipped to a large Patchwork Automaton, or equivalently big construct token, is near impossible to outrace for the decks you bring it in against. The main advantage of Spear over Collar is the extra +1/+1 and the trample, which protects you against your creatures being chump blocked, and then having your opponent kill their chump blocker before damage with either a removal spell or sacrifice effect.
Basilisk Collar has been picking up in popularity slightly, with Agatha’s Soul Cauldron giving us additional effective copies of the Walking Ballista, which Collar shines with. The main draw is a Ballista with 3+ counters (or equivalent with the Ballista ability) can completely control an opponent that would normally have creatures out of Ballista reach, most commonly Murktide Regents and anything with a Colossus Hammer on it. It also easily clears out boards where you’d normally have to make a choice, like against Yawgmoth, Asmo decks, or even the mirror.
I prefer Shadowspear over Collar currently, as the extra stats and trample are just too much of a game winner, and most scenarios where you can make full use of Collar, you would have won the game thanks to a sizable Ballista regardless.
Finally the last ability of Shadowspear, being able to remove indestructible and hexproof from your opponents permanents. Now this obviously almost never comes up, but the most common scenario is being able to Boseiju, Who Endures an opposing Kaldra Compleat, which can be a massive play against Hammer, especially game 1. It can also be used to destroy The One Ring, but Shadowspear is generally not good against decks containing The One Ring, so I wouldn’t recommend having it in the deck postboard for this purpose.
Springleaf Drum
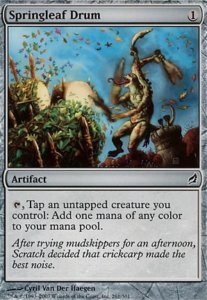
Good old Springleaf Drum, a mainstay of old-school Affinity decks. Currently still seeing multiple copies in Hammer lists, as well as inclusions in a significant amount of Urza’s Saga decks as a one-off, which is the same purpose we’re using it for.
Drum is not to be underestimated in our deck, it can be tempting to cut the card after sideboarding when you’re struggling for slots, but never do this. Slightly counterintuitively, it’s actually one of our best turn 1 plays, as reaching 4 mana for scales is a very strong breakpoint, allowing double spelling, or a spell plus activating Inkmoth Nexus.
It’s also great to have as an option when you are playing an Urza’s Saga on turn 1, this lets you fix hands that don’t have an immediate green source available, and still cast your Hardened Scales and a 2 drop on turn 3. It activates both of Zabaz’ abilities, and can work great in tandem with Patchwork Automaton, to power it up quickly if played early.
Springleaf Drum is significantly more useful in our deck than somewhere like Breach combo or Jund Saga, where it’s mainly used to make up for the lost land from having to sacrifice Urza’s Saga.
The manabase
Urza’s Saga
Urza’s Saga is one of the two new inclusions to the deck from MH2, and the more powerful of the two. Everyone who plays Modern even fleetingly should be very familiar with the card and what it can do, and in Scales this is no different. It grinds people out with constructs, fetches up key pieces to make combos possible, protect them, or shut down our opponents plan.
Generally you should be looking to play it on turn two, to keep open the possibility of a turn three Construct, and look for a turn four kill by fetching either an Ozolith or Zabaz. Sometimes, however, a turn one Saga is desirable, if your hand is looking like it could have a particularly explosive turn three, or the matchup demands it. It can even be optimal to play it on turn three at times, when you have an opening hand based around Patchwork Automaton, and really want to spend early turns casting artifacts to grow it, but this typically only goes for very grindy matchups where it’s important that you make constructs.
Always be aware of what exactly you are able to grab with its third chapter, between Haywire Mite, Pithing Needle, Grafdigger’s Cage, Relic of Progenitus, and more, a wide variety of strong sideboard hate pieces can be fetched. Know what you sideboarded before searching, and if necessary just look at your sideboard during the game before searching.
As with all Urza’s Saga decks, but more so with Scales, be very wary of Dress Down, the card not only kills any construct tokens you’ve made, but also functions as a counterspell for any of your XX or modular creatures, as they lose the ability to enter with counters. Dress Down can be prevented from killing your construct tokens, by placing a +1/+1 counter on them before it resolves, keep this option in mind to save them as a large enough construct is very hard for most Dress Down decks to deal with. On top of that, it essentially functions as a copy of any 1 or 0 cost artifact in the deck, with suspend 2 attached.
Fetching a Zabaz while one is already in play lets you place 2 counters on any of your creatures with the modular trigger of it dying to the legend rule (or 4 in the case of a Hardened Scales effect in play).
Urza’s Saga can be destroyed with its third chapter on the stack with a Nature’s Claim, in case you’re in desperate need of life against a Burn deck, while still letting you search.
Any Construct tokens can be protected from Dress Down by giving them a +1/+1 counter, this can be huge in the Murktide matchup, as they struggle to deal with large creatures once the Dress Down plan doesn’t function.
There is no chance to get priority in between you searching your library and putting a permanent into play, this means any opponent wanting to play around Pithing Needle has to do so before letting the trigger resolve, example below.
If your opponent has an Engineered Explosives available, and you have a Pithing Needle in your deck you are intending to fetch, do not tap the Saga for mana or a construct, just pass priority to the opponent. If they let it happen, you can then grab the Pithing Needle to protect any of your permanents already in play from the Explosives. If they respond by activating their explosives, you still get to activate the Saga afterwards to make a construct.
Inkmoth Nexus

Inkmoth Nexus is another iconic leftover from the Affinity decks of old modern, although its potential in Arcbound Ravager kills has only increased. The other colourless land that you will always play 4 copies of, next to Urza’s Saga.
Inkmoth can serve a wide variety of purposes, from killing opposing planeswalkers on 1 loyalty, to blocking lethal Murktides for a turn, to being sacrificed to an Arcbound Ravager at the low cost of tapping itself for the activation. Obviously there are the infect kill lines as well, but I trust those are a given at this point.
Something very interesting about Inkmoth is that it can be significantly harder to answer for some decks than others. Against Scam or Death Shadow decks, you can probably forget about ever getting an easy kill with it, as all their removal deals with it quite easily. However, against UWx based control decks, or to a lesser extent 4c Omnath, their best removal misses the sneaky little land entirely. Needing to rely pretty much completely on Solitude to take care of it, this makes it so that once you’re in a losing position against one of these decks, it can be correct to sacrifice your entire board to turn your Inkmoth into a 5/5 or 6/6 and present the turn 2 clock.
Keep in mind the way the infect mechanic functions, especially when facing off against opposing Inkmoths. If your hammer time opponent attacks with their 11/11 Inkmoth Nexus, Wielding its large hammer, blocking it with your Inkmoth will completely shut off the threat for the rest of the game, as their land will now be marked with a -1/-1 counter, leading to any activation having it immediately die to state based actions.
When setting up an Inkmoth Nexus kill with Ozolith, always animate it while in your main phase. The Ozolith needs to pick its target the moment the trigger goes on the stack, if you try to activate Inkmoth while in your beginning of combat step, it will be too late.
With the addition of Agatha’s Soul Cauldron, Inkmoth Nexus is one of the best ways to get around an opposing The One Ring, after your opponent has (presumably) gone shields down to cast it, set up an Inkmoth Nexus with 10 counters on it and the Walking Ballista ability under your Cauldron, then simply animate the Inkmoth in your opponent’s upkeep and deal them 10 points of infect. When doing this try and have as much mana available in their upkeep, as them killing the Cauldron in response to the Inkmoth activation will stop this.
Inkmoth can and should often be activated in response to a Field of Ruin/Demolition Field, where it can then either be sacrificed to Arcbound Ravager to deny both of you the land, or regenerated with a welding jar to get an additional land yourself.
When resources are running low in a game, don’t be afraid to sneak in a few attacks with an Inkmoth, as it can save you a turn later in the game when trying to kill them with infect.
Inkmoth is your second most potent way of killing an opponent, and if you have it, an Arcbound Ravager, and a Hardened Scales effect in play, it’s good to always be on the lookout for if you can kill your opponent, or what you would require to do so.
Green/red lands
Red mana is quite important in the deck, even with its only use being the first ability of Zabaz, which shows just how strong it is to have access to a destruction/sacrifice effect for your own cards. You have multiple options for which RG lands you can include in your list, and I will now be listing them in order of my preference;
Cragcrown Pathway/Timbercrown Pathway:
The red/green flipland from the most recent Zendikar set, a cycle of lands largely unused in the rest of Modern, what makes it useful in our deck? It’s the only land that can make untapped, unconditional green mana on turn 1, and the same for red mana on turn 5. I rate this very highly, as your first land might have to tap for green as much as 3 times during the course of a game, which can really add up for my later choices.
Grove of the Burnwillows:
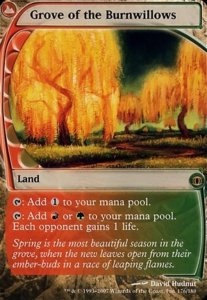
Grove is a lone land from an uncompleted Future Sight cycle. Thankfully for us, the one that is printed is excellent and fits right into our colours. Grove has the small downside of granting your opponent one life whenever you tap it for coloured mana, which most of the time is negligible as your combo kills overkill frequently. This can lose you games however, as especially against decks containing The One Ring, every lifepoint matters when you are trying to pressure them out of their inevitable card advantage win.
The card also has a hilarious game against Death Shadow decks, making it so they cannot safely play it before being well below 10 life, and you should be giving your opponent life as much as possible to keep them off this.
Karplusan Forest:
The mirror to Grove, as instead of gaining your opponent a life, you take one damage yourself. As it is very similar to Grove, you can view it in the same way, and your use of one over the other should mainly be based on the current metagame (is there more Scam and Burn? Or more Tron and 4C control). Beyond that there’s not much to it, and it’s a fine option to run.
Stomping Ground:
Mainly included as a one-off to have a fetchable red source off an opposing Boseiju, Who Endures. I have a hard time finding space for it, as the near guaranteed 2 damage you’ll take playing this card can be quite painful, but it’s a decent inclusion in metagames that contain a lot of copies of Boseiju.
Copperline Gorge:
I do not like this land, even though it seems great at first glance; untapped green and red? No cost to your life or your opponents’? what’s not to like! The problem comes with its clause, even though the synergy with Urza’s Saga is undeniable (sacrificing your Saga on turn four means the Gorge will still come in untapped), games where your fourth land is a Copperline Gorge which prevents you from double spelling that turn are just not worth it. The fourth turn is incredibly important in Hardened Scales, and the chance that one of your lands can prevent this is not worth it as far as I’m concerned. I would recommend against running this land, and would include any of the first three over it in all of my lists.
Utility Lands
Pendelhaven
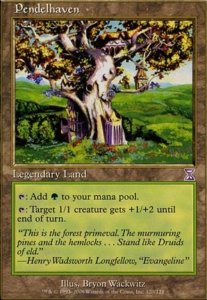
Pendelhaven is an easy freeroll in the deck, and well worth the slot. It takes the place of what would be just a regular forest, and all of its uses make it a very nice land to have access to. For some examples in how it can be utilised:
- Saving a 1/1 creature from an opposing Unholy Heat without delirium
- Blocking a Ragavan with a 1/1 and saving it or forcing a removal spell
- Protecting a creature from Wrenn and Six’ -1 ability
- Making the combination of Arcbound Ravager with 4 counters, Inkmoth Nexus, The Ozolith, lethal, by using the Pendelhaven on the Inkmoth before moving all the counters onto it, it will become a 10/11 creature for an exact kill
- Making opposing math significantly harder on a Fury, Fire//Ice, or Cast into the Fire.
- Doubling the clock of a lone Inkmoth Nexus
- Just simply attacking for an additional point of damage
All this coming at a cost that only amounts to being insignificantly weaker to a Blood Moon, makes Pendelhaven great, and worth its place in any build of Scales.
Gemstone Caverns
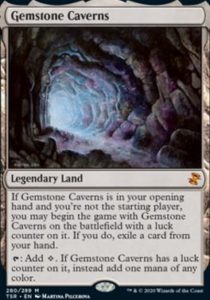
Probably best known for its use in three colour Crashing Footfalls decks, Gemstone Caverns gets a slot in our list as well. Caverns lets you ‘’steal’’ back being the starting player, at the cost of another card in your hand, with the nice upside of the land tapping for an unconditional 5 colours as well.
Caverns functions best in decks that can afford to not play a one drop on turn one, and don’t mind the colourless mana when drawn normally, both of which fit our deck.
The strongest play with Caverns is generally to play a turn one Patchwork Automaton, Urza’s Saga, or both. Using your second turn with 3 lands available to play a one drop you might have missed, or immediately being able to activate the Saga for a token is also quite common.
What to pitch with Caverns can be a hard decision at times, try to look for cards that don’t fit your curve well because of it (extra copies of Scales, Zabaz, etc.), or additional lands. Do be careful not to get rid of lands too eagerly, as missing your land drop on turn three can be backbreaking, especially if you’re intending to activate a Saga.
Caverns is always run with a single copy mainboard, with a possible second in the side to board in. If boarding it in, just cut a land for it, most often a Forest or Boseiju, depending on the matchup.
Blinkmoth Nexus

The older brother of Inkmoth, this one comes without infect, and one additional ability that’s more useful than it might look at first.
It serves many of the same purposes as its more popular counterpart, so I will just talk about the differences.
The lack of infect can be a downside as well as an upside, as Inkmoth sometimes struggles to kill opponents in low resource games, when all of our previous efforts have gone towards reducing the opponents’ life total to zero. Blinkmoth has no such issues, as it will easily carry 3 counters from an Ozolith to victory against a low life opponent.
Its ability to tap and grant a Blinkmoth creature +1/+1 works on itself as well as Inkmoth Nexus, allowing you to both improve its own capability at blocking, and double the clock of a lone inkmoth. When paired with Pendelhaven, it can grow itself or an Inkmoth nexus to an impressive 3/4 statline(remember to activate Pendelhaven first), making both an excellent blocker, and fast clock in Inkmoth’s case.
It shares the same resilience against most white(Prismatic Ending, Leyline Binding) and sorcery speed(Wrenn and Six, Brotherhood’s end, Teferi, Time Raveler) removal. All this combined makes it a solid inclusion in higher land count versions of the deck, where you want additional utility from those slots.
Boseiju, Who Endures
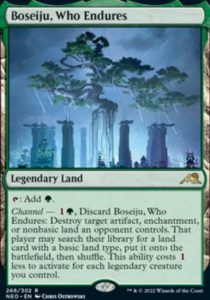
A card you should be familiar with, it finds a home in nearly every green deck as a one or two-off. A single copy has nearly no downside, while putting a second in the deck is still worth it for most single or two colour decks.
Most of the time Boseiju just makes untapped green mana the same way a Forest would, but it can also be discarded to destroy an artifact, enchantment, or nonbasic land an opponent controls, and lets them get any land with a basic land type in return. This is slightly worse than the way Assassin’s Trophy or Path to Exile works, as they can grab shocklands or triomes with this.
Boseiju’s ability is also discounted by one if you control a legendary creature, which is relevant with four copies of Zabaz in the deck, keep this in mind when planning around how much mana to keep open.
Boseiju does the most work in the mirror, against Hammer and in the Tron matchup. It’s useful against Amulet as well, but be careful on how you use it, as it’s generally a significant tempo loss and giving them an additional land means they are not slowed down that much when targeting their Dryad or Amulet.
Llanowar Reborn
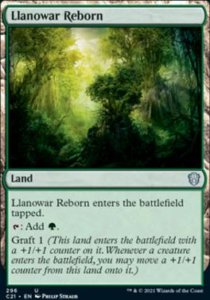
A quite unique land from Future Sight, this one has the Graft 1 ability, which reads ‘’This land enters the battlefield with a +1/+1 counter on it. Whenever a creature enters the battlefield, you may move a +1/+1 counter from this land onto it.’’
Its main use is letting a turn 2 Ballista enter with 2 counters even without a Hardened Scales in hand, which is great at killing opposing X/1 creatures and having your Ballista stick around for an easy two for one. It also lets you make the well-worth trade of killing a Dauthi Voidwalker the turn it enters, which is very important in the scam matchup.
Additional value is in protecting creatures from turn two Wrenn and Six, Lava Dart, Orcish Bowmasters, and just generally increasing the effectiveness of modular and Hangarback triggers.
An interesting but niche use for the card is that as long as it has a counter on it, a trigger will go on the stack whenever a creature enters the battlefield. This is most useful against Dryad of the Ilysian Grove and Azusa, Lost but Seeking. Normally, since playing lands does not use the stack, Amulet Titan players can cast one of these creatures, and immediately make use of the extra land drops upon resolution. With Llanowar Reborn in play however, it will put its trigger on the stack first, before your opponent regains priority and allow you to either kill the creature with a Dismember or large enough Walking ballista before they get to make use of the extra land plays.
Phyrexia’s Core

Core is a land that does its best work in meta’s with Archmage’s Charm being a popular card, getting your Hangarback stolen by it can be absolutely brutal, and will most likely lead to a loss. Similarly useful as an inefficient way to sacrifice creatures for death triggers when Karn, the Great Creator is on the field, or to still get value against a Prismatic Ending or Leyline Binding.
Similarly useful against a Karn that has grabbed an Ensnaring Bridge and put it into play, as you can attack with your creatures still low power, and then move a larger creature’s Modular counters onto the attacker during combat, even if your artifact abilities are turned off.
It’s a decent one-off inclusion in metagames that favour it, so make sure to be aware of your local metagame before deciding on its inclusion.
Power Depot
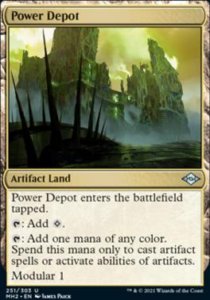
One of very few true artifact land options in modern, Power Depot makes up for its tapped downside by having the modular ability on a land, which makes it very similar to Llanowar Reborn in entering with a +1/+1 counter.
Depot can add a ton of counters to an Arcbound Ravager combo kill, being just as good as Zabaz or Arcbound Worker to sacrifice (With no Scales in play). Its modular effect is also improved by Zabaz, letting you get a surprising amount of counters out of your land drop for turn.
The counter it enters the battlefield with is not affected by Hardened Scales, but it does work with Ozolith, the Shattered Spire, it can also hold counters from the latter’s activated ability.
Power Depot’s main risk is similar to its strength, which is its status as an artifact land, making it vulnerable to Karn, the Great Creator, and Force of Vigor. I would recommend against running the card in metagames where these two cards are prevalent.
It remains an artifact under Blood Moon, as it’s a supertype, remember this when playing against the card.
With that all the maindeck cards are concluded, and we can move on to sideboard inclusions.