If you are new here, don’t forget to check our Discord Channel. it’s free for everyone!
If you are looking for more Burn content including an updated sideboard guide, click here.
General concept of the archetype
Burn main gameplan
Burn is a linear aggro deck that uses cheap creatures and direct damage spells to lower the opponent’s life total to zero as fast as possible. It’s usually a very proactive and straightforward strategy, but it can also switch gears and become sort of a control deck when the matchup forces us to do it.
Why is it good? What is the best metagame for this deck?
Burn is a fair deck – it doesn’t play any free spells, also doesn’t try to cheat anything into play, draws only one card per turn, etc. Burn’s biggest strength is its redundancy – every card does the same. That’s why it’s hard to stop it with traditional forms of interaction like countermagic or discard – they can be overpowered by drawing burn spells from the top of the deck. Its best matchups are slower decks that either don’t have any creature removal (like Tron) or have a lot of it, but also no other ways to deal with the damage dealing directly to the face (Scam). It’s also quite good at punishing decks that use life total as a resource (Yawgmoth).
What are its biggest weaknesses?
Burn’s biggest strength may become its biggest weakness in the wrong metagame. If the one thing that Burn does well isn’t good enough, it’s extremely difficult to work your way around it. Turn four kills are doable if the opponent doesn’t try to interact with us. From time to time it’s possible to assemble a turn three kills, but they require having a creature or two unchecked and a pile of one mana burn spells. Usually, opponents have answers though, so games can go longer, to turns five or six. At this point, most combo-oriented strategies will be able to assemble their synergies. Even worse if they can do it earlier, for example on turn three – Burn can’t do much about it.
Another problem comes from Burn’s linear nature. Since it does the same thing over and over again, it’s trivial to stop it for anyone who decides to do so. For example, a stupid Dragon’s Claw on turn two is close to unbeatable in most situations. Any other form of lifegain is also quite hard to beat, since Burn operates on very limited resources. Burn can be good from time to time, but will never be the best deck in the long run – it’s just too easy to hate out.
A typical decklist
Burn hasn’t changed much since the beginning of its existence. It’s just a bunch of the most efficient burn spells in the format mixed together. The newest addition is Roiling Vortex.
Maindeck – analysis card by card
When we evaluate cards in Burn, the most important question we ask is what’s the rate of damage to the mana spent on the card. The baseline is Lightning Bolt – one mana, three damage, so as efficient as possible. In an ideal world, I would love to play forty Bolts and twenty lands. Sadly, it’s not possible, so we have to add other cards that do similar things, but their other abilities fit well into Burn’s needs.
One mana creatures

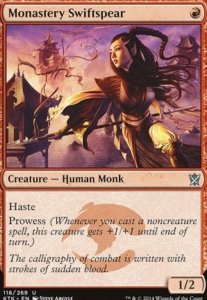
Both Goblin Guide and Monastery Swiftspear have the same role in the deck – they are repetitive sources of damage. They can be immediately killed or blocked all the time and thus be useless, but the upside when it’s left unchecked is too valuable to pass on. When Goblin Guide deals six damage, it’s very hard to lose. It’s even possible to deal more than that (my current record is twelve damage from the same Guide), but it’ll happen extremely rarely. If it’s stopped by removal, it’s not the end of the world since it means the opponent wasn’t able to set up the pressure to race you. Usually, the goal is to deal damage with your creature twice. For Goblin Guide it means four damage, so more than the average damage/cost rate (that’s why you should always lead on Goblin Guide over Swiftspear if you have a choice). With Monastery Swiftspear it’s harder to assemble a ‘deal four damage total’ since we need other spells to line up well. Works great with Lava Spike and Lightning Bolt, but It can be awkward with Rift Bolt and Skewer the Critics and the lack of other sources of damage to enable Spectacle before combat. It’s a big nonbo, but there aren’t any better creatures to replace Swiftspear and that’s why it’s still in the deck. It’s not like Swiftspear is a strictly worse Guide. Sometimes, it’s even better – usually in scenarios when triggering Prowess is used to increase toughness, so Swiftspear can survive blocks – for example having a 2/3 instead of a 2/2 is important versus Orcish Bowmasters.
One mana burn spells
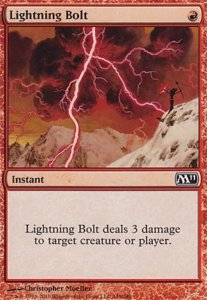
It’s the essence of the deck. In this category, we have all cards that can deal three damage for one mana. The ideal one is Lightning Bolt. It’s an instant speed, three damage to any target, so it works both in goldfish scenarios and when you want to control the board. Any other effect available has downsides:
- Lava Spike is as good as Bolt in the goldfish mode, but can’t act like a creature removal
- Skewer the Critics is only Sorcery speed and activating Spectacle can be quite challenging sometimes. The right sequencing of spells can help you not having it as a dead card in hand, but it’s not always doable. When it costs three mana, it’s clunky and can be a bad topdeck if you have only two lands. It won’t be stopped by Chalice on one though.
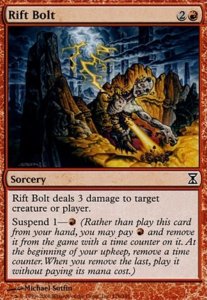
- Rift Bolt costs one mana in Suspend mode. Usually, it’s a downside since it delays the damage by one turn, and can be stopped by Teferi’s static ability or The One Ring’s protection trigger. Suspending it also doesn’t trigger Swiftspear, so it can be awkward in early turns. Sometimes waiting a turn can be a positive thing, for example when you want to stack a lot of burn spells in one turn, so the opponent won’t be able to counter them all. Three CMC helps against Chalice on one.
- Shard Volley. It’s rarely played because the drawback is very impactful. On the other hand, it can be ignored if Volley is the last burn spell to be played. That’s why I like having one copy in the deck, just as yet another ‘one mana three damage’ effect, so I can curve out a bit better.
Two mana burn spells

Burn is short on playables. It may sound strange, but that’s a fact. If it was possible, I would only play one mana burn spells. Sadly, It’s not doable in Modern, so we are forced to play more expensive cards as well. They may look more powerful than some of your worse one mana spells, since they have other useful text attached to them, but having too many two mana burn spells in the deck increases the risk of not curving out on time. The deck usually has somewhere around sixteen two mana burn spells. The only mandatory four-off is Boros Charm, the rest (including Roiling Vortex and Eidolon) are customizable.
- Boros Charm. It’s the only card in the deck that guarantees dealing four damage. It’s so important that it’s worth splashing a second colour for it. It also has other two modes which are rarely used, but it’s good to remember they are here: giving the creature a double strike can be useful when facing Leyline of Sanctity, so you can still convert Boros Charm into damage. Giving indestructible to your permanents may be useful if you centre your game around hate pieces like Roiling Vortex, Chalice of the Void, etc. or you can get a profitable trade in combat.
- Searing Blaze. The card is great in creature matchups when you don’t have to choose if you want to kill a creature or go face, you just get both. The problem is that a lot of things need to line up well to make this happen – the opponent must have a creature, you need to play a land, etc. That’s why the card is time-sensitive – it’s great only in very specific scenarios and it will often force you to go for turn two Blaze even if the other play could have been better simply because if you have only two lands at the ready, it’s not guaranteed you’ll ever draw a third one. Think about your land drops and cracking fetchlands to increase the chances of casting Searing Blaze with landfall at any point in the game. Remember that Searing Blaze targets both a creature and a player, so even if the opponent for example sacrifices a creature, they’ll still take damage.
- Skullcrack. If the opponent doesn’t have any sort of lifegain, this card is just bad – two mana for an instant Lava Spike is below average, even for Burn. But if they do have ways to gain life, it turns out to be a counterspell to their lifegain effect with three damage attached to it. The card is very hit or miss and I tend to side it out quite often, but there simply aren’t any better options available. It’s also important to remember about the ‘Damage can’t be prevented’ part – it can bypass protections, for example from red on Sanctifier En-Vec or Kor Firewalker, it can also ‘counter’ Deflecting Palm. If you don’t expect to see a lot of lifegain effects in your local metagame, you can trim it or even cut it entirely for other options.
- Lightning Helix. In the past, it was commonly picked as a playable burn spell for two mana since it’s quite good in damage race situations. After MH2 was released, it got much worse thanks to Ragavan – when your opponent steals your Helix and casts it, it’s close to game over for us. Also more games are about dealing lethal damage before the opponent totally overwhelms us with their pressure or combo (for example Cascade decks, Hammer, etc.), so gaining three lives isn’t as good as it was before. Still, it’s quite good in the mirror, so it’s ok to have it, especially if the other two mana options – Skullcrack and Roiling Vortex – aren’t well-positioned.
Roiling Vortex
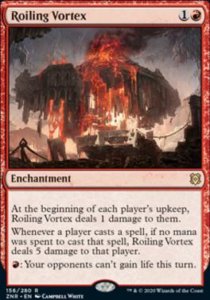
It’s a relatively new addition to the deck (it was printed in September 2020). At first, it was played in Burn’s sideboard, but eventually, the metagame evolved to the point when Roiling Vortex was better positioned than the other two mana repetitive source of damage the deck could run (Eidolon). The card has three abilities and all of them are important from Burn’s perspective:
- One damage per upkeep. This part shines in slower matchups. They should not have ways to apply enough pressure to make the self-inflicted damage matter. When played on turn two versus midrange or control, it usually deals four or more damage, which is above average for a single card. On the other hand, if Roiling Vortex is topdecked in later stages of the game, it often won’t have time to do enough. The ping can also backfire in race situations.
- 5 damage when the spell is cast for no mana. Once Roiling Vortex is on the battlefield, players rarely cast Solitude, FoN, Mishra’s Bauble, etc., but from time to time they do, and it usually ends the game on the spot. I value this trigger as a guaranteed source of damage only versus Cascade decks, or if the opponent has a suspended card. Watch out for your own Rift Bolts though! If you plan to suspend it, do it before you cast Roiling Vortex, or keep the extra five damage you will take in mind.
- Stopping lifegain. We wouldn’t play this card only because of this effect, but it’s a great addition to other abilities the card already has. Modern has a few incidental lifegain effects and having a maindeck way to negate them is a good thing. Stops Omnath (although it can be overpowered by fetchlands), Haywire Mite, Shadowspear, Food tokens, lifelink from creatures, etc., but at the cost of mana, so it can be ineffective when you work on only two lands.
In my opinion, playing a full playset in the 75 is mandatory. You can even play all four of them in the maindeck, but it can change depending on the metagame. The general rule is the slower the metagame is and the more cascade decks are around, the better maindeck Roiling Vortex is. If you expect fast creature decks instead, you can keep more copies in the side.
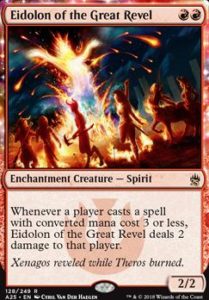
Eidolon of the Great Revel
It used to be an auto inclusion in every Burn deck since it was printed. The theory was simple – when it’s on the battlefield, both players will take damage from it but thanks to our burn spells, the opponent should die first. Sadly, it lost a lot of power after the printing of cards with high CMC that can deal with it for cheap: Solitude, Fury, Leyline Binding, Boseiju, Who Endures, etc. That’s why it doesn’t see that much play anymore, but it’s still a powerful card and when those cards aren’t seeing much play, it can come back to Burn’s decklists from time to time to punish decks with a bunch of cantrips.
The manabase
Burn’s manabase is the same in nearly every decklist. It consists of:
- Four Inspiring Vantage
- Five Canopy lands
- Six fetchlands
- Four mountains: 2x Sacred Foundry + 2x basics
- One free slot, can be either a fetch or another fetchable land, it’s mainly a personal preference
The black splash
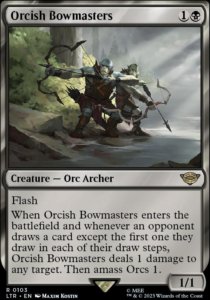
Technically, it’s possible to add a light black splash, so we can get access to two good maindeck cards – Bump in the Night and Orcish Bowmasters. In theory, it all looks great – Bump is yet another one mana burn spell, and the deck wants as many of them as possible, and Bowmasters is just a great card. I tested the Mardu build for some time and eventually came to the conclusion that the cost outweighs the reward. There are two major problems – the first one was how you should play Orcish Bowmaster mirrors versus how much Burn wants to be proactive. In theory, the one who plays Bowmasters second has an advantage because it can ping the first one, so it should be better to wait with our Bowmaster, but waiting means that the opponent will have more blockers, removal, etc. Burn is not in a position to slow roll its threats, so Bowmasters should be played ASAP, in order to increase chances to get three or more damage out of it. This conflicts with how Bowmasters mirrors should be played. The second problem is the sacrifices that had to be made in the manabase to splash black. Since Burn doesn’t draw that many cards and often works on only two lands, it’s crucial to secure the mana from early fetchlands, so we could cast all of our spells. This led to situations when I was often forced to search for a black dual even when I didn’t have a black card in hand. If we combine that with the fact that I had to add more fetchlands, shocks and cut fastlands so the manabase had enough white and black sources, it turned out to be much more painful and unstable. The problem was even worse if I sided in Sanctifier En-Vec – securing black and double white wasn’t feasible. That’s why I eventually abandoned the idea of the splash.
Sideboard options
Sanctifier En-Vec
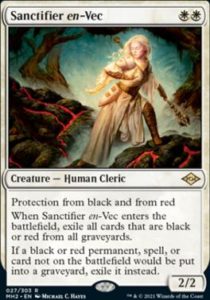
Its main use is to stop Scam – once on the battlefield, it’s very hard to kill, it stops their whole aggression, and can let you deal final points of damage in combat. Its graveyard hate passive doesn’t let them cheat anything into play with their scam tricks, exiles Seasoned Pyromancer, etc. For me this alone is a reason to play a full playset. Sanctifier can also be good versus other decks with red or black removal, but its power decreases the more creatures that are not stopped by protections they have. For example, it’s quite good against Murktide, but if they play Ledger Shredder (an uncommon choice after the release of Orcish Bowmasters), Sanctifier loses a lot of its value. A similar situation is versus Jund Saga – technically Sanctifier is unkillable, but can be stopped in combat thanks to Tarmogoyf and tokens from Urza’s Saga. The card is also decent in the mirror, but it’s not a game over by any means – it’s a good blocker, but it can be raced by burn spells and also forces you to take damage from the manabase thanks to the double white requirement. It can also be sided in mainly as a graveyard hate, for example against Goryo’s Vengeance or Dredge.
Path to Exile
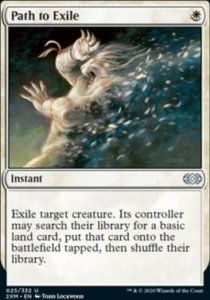
It’s our weapon of choice versus big creatures. Side it in if you expect to play against Murktide, Death’s Shadow, Primeval Titan, Wurmcoil Engine, Tarmogoyf, large Saga Constructs, etc. It’s also the best answer to problematic creatures with protection from red like Kor Firewalker.
Smash to Smithereens

It fits into the philosophy of having each spell in your deck dealing damage to your opponent. There are numerous matchups where artifacts are involved. Watch out to not get blown out by the opponent dealing with the artifact in the response – if Smash loses a target, it won’t deal damage to the opponent.
Searing Blood
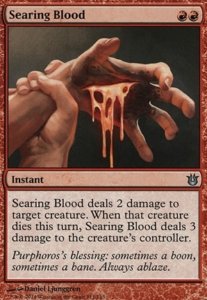
Another two mana spell that deals three damage and does something extra. It acts as extra copies of Searing Blaze. If the metagame is filled with cheap creatures (for instance there’s plenty of Yawgmoth, Merfolk, etc.), you can add one or two copies to the sideboard. Note the weird wording on the card: ‘When that creature dies this turn, Searing Blood deals three damage’. So it means that the creature doesn’t have to die right after it resolves, it can for example be killed in combat later on or be finished by another burn spell.
Deflecting Palm

It’s a good card if you want to punish opponents for having huge creatures. It’s the best tool to get wins out of nowhere versus Hammer. It’s also quite good against midrange decks that have two or more creatures that can have four or more power – Jund Saga with Tarmogoyf and tokens from Urza’s Saga is a good example, cascade decks (Rhinos and Living End) can also be blown out by a timely Palm too. The card does wonders when everything goes right, but it can also be a bad topdeck in creatureless scenarios or when there are many small creatures. Its use is also time-sensitive, so I don’t recommend it versus decks that have countermagic – once they deploy a big creature (like Murktide or Death’s Shadow), it’s easy for them to attack with a counter backup. Palm is also good versus some combo decks like Belcher or Amulet when Titan attacks for sixteen damage. It’s also solid in the mirror, and usually acts like a weird Lightning Helix, just watch out for Skullcrack, since Palm prevents damage and Skullcrack stops it. Remember that Palm works even if the opponent has Leyline of Sanctity.
Wear//Tear
Many Burn players think about Wear//Tear as a modal card. In my opinion, the ‘Wear’ part is much less exciting because we already have Smash to Smithereens. You’ll probably often use Wear as Shatter just because it will turn out to be a useful tool in a given boardstate, but it’s not the main purpose of having this card. It’s here because of Tear. It’s our best answer to Leyline of Sanctity, Urza’s Saga, and Underworld Breach – if you expect to play against those, consider adding it to the mix.
Chalice of the Void
Chalice in Burn is always meant to be played for zero, since any other mode will also stop our spells from working. In practice, it has one purpose – stop Cascade decks, mainly Rhinos and Living End. It costs zero mana, so it doesn’t impact our curve (it can even help Monastery Swiftspiear grow), and it shuts down their engine, often forces them to either two for one themselves with FoN or to spend extra time so they can find and cast an answer (for example Boseiju, Who Endures) before they can Cascade. This means more time for us to execute our gameplan. Chalice technically can also be good versus other decks that rely on zero mana spells, for example, combo Breach on the play, but it’s not essential in those matchups, so relying on Roiling Vortex and burn spells as hate can also be fine.
Rest in Peace
Narrow but powerful card. If you expect to play against a ton of Living End and maybe other graveyard-centric strategies like Goryo’s Vengeance or Dredge, you can add one or two copies to your sideboard.
Exquisite Firecraft

It’s the best card to topdeck when you struggle to deal the final points of damage to a control player. Firecraft has its moments, but it’s also clunky – four damage for three mana is not the best rate. It’s also not trivial to get to three lands, so I would side it in only in slower matchups when I know that games will go long.
Molten Rain
I saw it in other Burn players’ sideboards and I get why they want it, but I’m not the biggest fan. In theory, it can be sided in versus any ramp deck like Tron or slower midrange-control strategy since destroying their land should slow them down, so you should have more time to attack with creatures and draw more cards. It sounds nice, but the card has some downsides – it’s a tree mana sorcery, so it plays horribly against countermagic, especially Spell Pierce. It also doesn’t fit well into an instant-speed gameplan Burn usually tries to execute versus control decks. That’s why I’m sceptical, but it’s worth noting that the card exists.
Kor Firewalker
If you really want to win mirrors, Kor Firewalker is the best tool to do so. Nowadays, it’s not as played as it was before because Sanctifier En-Vec does more for the same price and stats.
Gameplay
Burn is a simple deck and oftentimes it doesn’t require a lot of skill to play well. But what separates a good and a great Burn player is the knowledge that you can do something more than just curve out with your spells and hope that’s enough. There are three main gameplans that every Burn player should know:
- Standard. It’s a typical ‘play your creature and cast burn spells to the face’ gameplan that’s easy to assemble and execute. Focus on curving out and killing the opponent as fast as possible. Try to play your worse and more conditional burn spells first, so you’ll have more flexibility with better ones in later stages of the game. For instance, try to not get blown out by something stopping your Rift Bolt (like Teferi or One Ring) or not having Spectacle for Skewer the Critics because the opponent had a counter and you should be good to go.
- Flash. This gameplan is used versus decks with countermagic to maximise the odds of resolving as many spells as possible. The whole concept is based on the fact that as long as you have cards in hand, the opponent can’t execute their own gameplan freely. That’s why playing everything on the curve is a recipe for disaster because it plays perfectly into the opponent’s plan – counter things and deploy a game-winning threat. It’s often better to do nothing or only cast one spell per opponent’s end step or when they tap out. They will have to respect your ability to burn them out if they don’t keep shields up, so this will lead to them not executing their gameplan. Waiting means drawing more cards, so having more fuel to work with and making more land drops, so soft countermagic like Spell Pierce won’t be as effective moving forward.
- Control. It’s a gameplan built around our ability to impact the board. Some of our burn spells and sideboard cards may be used to keep the opponent’s battlefield in check, not only going straight to the face. It’s useful versus strategies that are faster than us and relies on having huge creatures or lifelink effects, like Hammer. In this matchup, keeping the mana up at all times, so you can represent Smash to Smithereens or Deflecting Palm, is extremely important. It can also work against midrange decks that deploy only one threat and have no other way to pressure us – sometimes it’s better to kill it because their lack of pressure will lead to us drawing more cards in the future.
Random tips
- If you have a choice between Goblin Guide and Monastery Swiftspear, start with a Guide. It has bigger odds of dealing more than three damage since it requires only two attacks. I can imagine some exceptions in goldfish scenarios and a bunch of Bolt effects in hand, but in practice, Guide is a safer turn one play.
- If you know the opponent will kill Goblin Guide, for example, when you play versus Scam and after your turn one attack they flipped Fatal Push and they play Swamp go, it’s obvious they want to get an additional Guide trigger. If that’s the case, you can consider not attacking – your creature will be killed anyway and you won’t give them a possible free card.
- Think twice before you play your land. Every land drop is a resource thanks to Searing Blaze. If possible, play fetchlands as the last ones, so you can always represent landfall on the opponent’s turn.
- It’s legal to play Searing Blaze without landfall – you’ll just deal fewer damage. It may sound bad, but if you are being attacked by something like a dashed Ragavan, using Searing Blaze just to deal with it is usually worth it.
- A turn one Ragavan, Nimble Pilferer is an extremely dangerous threat for Burn – nearly everything they flip is cheap and speeds up the clock significantly or slows down ours by killing our creatures. Do everything to not let it connect. Using Lightning Bolt or Searing Blaze is an easy one. You can also play a creature and pass – there’s a nonzero chance you’ll be able to trade in combat or the opponent won’t attack at all. If they kill it, at least they won’t get to potentially get rid of it with the card they flip.
Keep or mull
The decision to either keep or mulligan the hand in Burn is rather simple – all you need is two lands and a bunch of spells to deal damage. I wrote down some rules and pro tips about how to evaluate the hand:
- I basically never keep sevens on the play with only one land – the risk of stumbling is too high. I would keep a low curve six mostly because of how low the odds are to win from five – Burn is a critical mass deck and we can’t afford to lose too many resources while mulliganing. On the draw, I can see even keeping a one land hand if it’s phenomenal, but it’s usually better to go down to a six card hand with two lands.
- I try to evaluate how much damage each of my cards will deal and I check if I have twelve or more. Sometimes it’s simple since you can’t deal fewer than three damage from Lightning Bolt, but there are cards that are harder to evaluate. In the blind I count Roiling Vortex as 3.5 when I’m on the play and 3 when on the draw. A second copy is 2.5 OTP and 2 on a draw. Creatures are harder to gauge. If I have a Goblin Guide on the play, I estimate it as 4 damage. On a draw, it goes down to 2.5. Monastery Swiftspear counts as 3.5 on the play and 2.5 on a draw. Every other creature I have in the opening is 2.5.
- Even if you have the damage you need, you also need to curve out nicely. The hand overloaded with two mana spells can be quite clunky. One mana spells are mandatory.
- Some cards work well with others, while others actively hurt each other. If possible, avoid bad combinations. For example, Monastery Swiftspear wants a bunch of Lightning Bolts and Lava Spikes in hand but can be subpar with multiple Rift Bolts or Skewer the Critics. Another unwanted pair is Rift Bolt + Roiling Vortex, especially in multiples. It can also be awkward to keep all creatures hands in blind because it can be blanked by blockers or multiple Roiling Vortexes since they are quite slow and often you won’t be able to finish the game if you spend turn two and three for them.
- If you side in Sanctifier En-Vec, having Mountain or Fiery Islet in the opening hand can be awkward. Not having double white with two Sanctifiers may be a reason to mulligan.
BONUS – an interesting situation to analyse.
When I was testing Burn, I played many interesting games and made more decisions than any non-Burn player could imagine, but there was one that led into many interesting discussions and even articles analysing the case.
I played versus Grixis Shadow and got this board state:
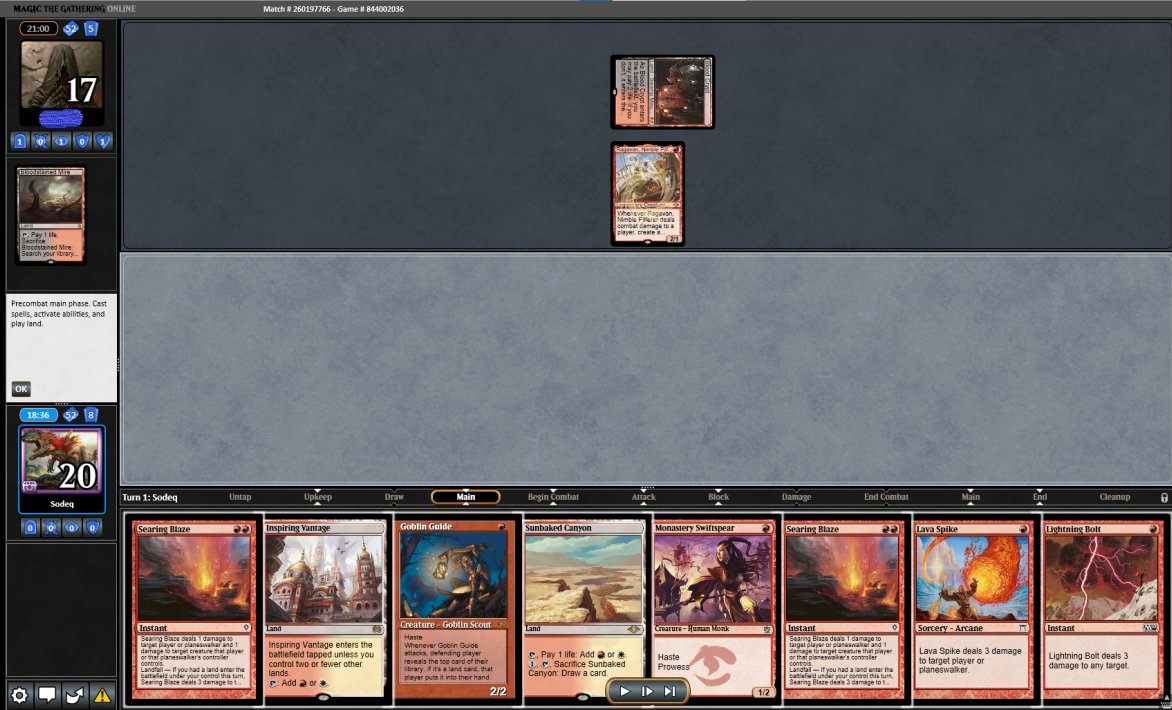
I can guarantee you that if you think about this board state, you’ll learn more than from playing fifty games with the deck. Think about the possibilities you have, what’s your gameplan in the matchup, the pros and cons of each line you can take and what outcome minimises the risks the most.
You can read the whole discussion other players had on Twitter here.
I also strongly recommend you check the reasoning presented by Patrick Sullivan in ‘Unsleeved’ here. There’s also an analysis prepared by Michael Flores here.
Personally, I’m closer to Sullivan’s reasoning, but a lot of lines are reasonable here and in my opinion, it’s a perfect example to realise that Burn is not as brainless as many people think it is.