If you are new here, don’t forget to check our Discord Channel. It’s free for everyone!
Introduction
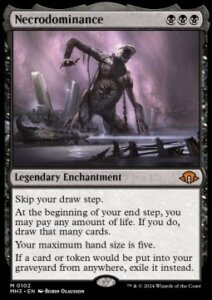
What is Necrodominance?
I will discuss the version that includes The One Ring, as those without it and those featuring main deck Dauthi Voidwalker and Not Dead After All tend to be quite different. This version, which I refer to as Mono Black NecroRing, is a midrange combo deck. The deck seeks to control aggressive and fast strategies like Nadu, Energy, or Prowess while adopting an aggressive stance against control, combo, and big mana decks such as Jeskai Control, Tron, or Ruby Storm.
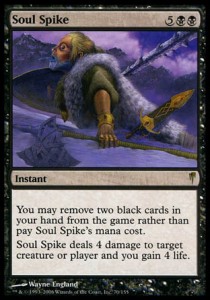
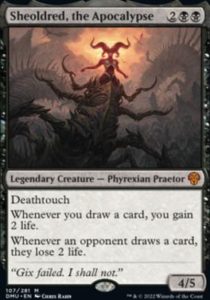
Soul Spike and Sheoldred, when combined with Necrodominance, enable a two-turn kill at a relatively low mana cost. The first two aspects of this strategy are not new – Orcish Bowmasters, Sheoldred, Grief, discard spells, and removal spells have been the staples of midrange black decks for well over a year at this point. These cards allow for flexibility, enabling you to navigate different roles effectively. For example, Grief can be “scammed,” hard-cast, or pitched with another card.
The significant change in playstyle revolves around the card Necrodominance. In practice, it’s quite straightforward: you aim to draw a lot of cards, and the deck is constructed to utilise them efficiently. The best “combo” kill you can aim for might look something like this:
- Turn X: You cast Necrodominance, drawing a substantial number of cards (how to decide the number will be discussed later).
- Turn X+1: Evoke Grief to discard an opponent’s removal spell, for instance, then cast Sheoldred. At the end of the turn, draw heavily and cast one or more Soul Spikes for 0 mana.
- Turn X+2: Simply survive until the end of your turn, draw a large number of cards (or even your entire library), then cast multiple Soul Spikes (which usually costs you two black cards) and Orcish Bowmasters before discarding during the cleanup step.
In practical terms, this strategy allows you to play a regular midrange game until you sense the opportunity to “combo off.” At this point, you aim to establish the Sheoldred and Necrodominance combination on the board. While Sheoldred isn’t the only method for gaining life, it ensures that you have sufficient life after the first draw to continue drawing as many cards as necessary.
What are its biggest strengths?
The deck excels at exploiting free black interaction and creating difficult spots for your opponent with Sheoldred or Orcish Bowmasters. Since you’re playing a mono-colour deck without catch-all answers, you’re preying on decks you can interact with profitably, or that you can overpower with your fast openings. A few examples of favourable matchups include:
- Jeskai Control: Their removal spells don’t line up very well against Necrodominance and The One Ring, allowing you to go all-in on these cards to secure victory.
- Boros Energy: All of our interaction is effective, and gaining a substantial amount of life is highly advantageous. The One Ring is particularly key in this matchup.
- Living End: You can slow down the game effectively, ultimately winning with a couple of Soul Spikes.
Thanks to the abundance of discard spells, the deck isn’t particularly troubled by counterspells alone, but is more vulnerable to permanent-based hate that can destroy both Necrodominance and The One Ring, such as Haywire Mite. It’s challenging for opponents to interact with the various threats and engines of Mono Black, but the more an opponent can get through your discard, the tougher it becomes.
What are its weaknesses?
There are two scenarios where the matchup can feel difficult: when your interaction doesn’t line up well, and when drawing your entire deck over several turns isn’t too impressive in the face of what your opponent can achieve with their resources.
A few examples of unfavourable matchups include:
- Tron: They can go over the top of us and interact with our card advantage engines.
- Yawgmoth: Their strong ability to maintain the board and deal with our threats over the long term makes the game slow and difficult to close out.
- Dimir Frog: Their threats often need to be removed immediately, and the combination of Orcish Bowmasters and Counterspell is particularly difficult to handle.
While there isn’t a specific hate card against Mono Black Necro, several cards can effectively target one of our key elements. Additionally, our deck struggles to deal with artifacts and enchantments. A short list of problematic cards includes:
- Vexing Bauble: Stops Soul Spike and Grief at no mana cost and can be tutored with Urza’s Saga.
- Haywire Mite: Deals with Necrodominance and The One Ring at instant speed and can be tutored with Urza’s Saga.
- Disruptor Flute: Can shut down The One Ring after it’s cast but before it resolves, making it difficult to discard.
- Boseiju: Can destroy Necrodominance after it’s cast but before it triggers and can’t be tagged with discard.
- Chthonian Nightmare: Generates value each turn with cards like Ajani, Nacatl Pariah, or Orcish Bowmasters, and if sequenced correctly might be impossible to discard.
- Pithing Needle: Stops The One Ring and can be tutored with Urza’s Saga.
- Birthing Ritual: Helps finding multiple copies of Orcish Bowmasters and generate value each turn.
It’s essential to assess whether you can handle these cards in each matchup (though sometimes you may have other threats to manage) and adjust your strategy accordingly – either finding a way to ignore these cards or recognising when you have no other options, in which case you should play more aggressively.
Primer
The main gameplan
The main game plan is straightforward: use interaction to resolve one of the draw engines (The One Ring or Necrodominance), then stabilise and take over with Sheoldred. In your opening hand, you should look for at least two lands, an early interaction, and a value engine (or tutor). I tend to mulligan seven card hands without these conditions met. In some matchups, you could get away with a double Grief on turn one, followed by cheap threats and interaction (such as against Storm or Tron), or playing as a Sheoldred control deck (against Boros Energy or Mono Black Scam), but these strategies are typically your Plan B.
When deciding how many cards to draw with Necrodominance, I consider several questions:
- Is my life total under pressure? If not, you can draw more.
- Does my opponent have the potential to survive me drawing my entire deck? If not, you can draw more.
- Does my opponent play a fast deck? If not, you should draw less.
- Do I need a specific card on my next turn? If not, you should draw less.
Here are some specific examples:
- Against Tron, I want to win quickly by using impactful threats (Sheoldred and Orcish Bowmasters) or sideboard cards. I can’t afford to simply play a land and discard on my next turn. Conclusion: I draw heavily with Necrodominance, often spending all but one of my life points on the first trigger.
- Against Jeskai Control, I can’t win quickly, so I need to play discard spells before deploying threats. Phlage and their own The One Ring can slow down the game significantly. Conclusion: I usually draw up to five or six cards and aim to play out my entire hand on the following turn.
- Against Boros Energy, I can’t win quickly, and I need to remove their threats, but my opponent is highly aggressive. Conclusion: I draw enough to have good odds (around at least eight percent) of finding Sheoldred, The One Ring, a life-gaining removal spell, or another relevant card depending on the situation (you might want to consider dabbling into geometric distribution yourself if you’re comfortable with statistics).
If you already have a Soul Spike in hand, you can effectively add three to your expected number of cards to draw initially. If you need to trigger Sheoldred multiple times on your next turn, be cautious not to draw too much the turn before. The full deck contains twenty points of direct damage (4 Soul Spikes and 4 Orcish Bowmasters), so when you start to untap with Necrodominance on the board, you can afford to draw a lot more if your opponent’s life total is lower than the total amount of direct damage left in your deck (Sheoldred can sometimes account for 2 or 4 damage).
You should not hesitate to aim for powerful turns as soon as possible; this is not a deck to play it safe. If the game drags on, any life lost will make it more challenging to use Necrodominance effectively later on.
Important deckbuilding decisions
The One Ring is the key distinction between the control-oriented version of Mono Black Necro and the more aggressive variant. If you’re aiming for longer games, a full playset is a must.
The core components of the deck typically include Orcish Bowmasters, Fatal Push, March of Wretched Sorrow, Soul Spike, Sheoldred, Phyrexian Tower, a mix of Inquisition of Kozilek and Thoughtseize and various MDFCs (Boggart Trawler, Fell the Profane, Malakir’s Rebirth).
- Profane Tutor: Useful for fetching sideboard silver bullets and making your “perfect” turn four more consistent. It stabilises the opening hand, but struggles in matchups where you need to be fast, either on offence or defence.
- Sorin of House Markov: Provides a way to kill in one turn after resolving Necrodominance. However, it is a subpar two drop, requiring additional cards and time to become effective, which makes it rather mediocre.
- Dauthi Voidwalker: A well-known threat and hate card, but the decks that are most vulnerable to it aren’t currently our primary concerns, and it doesn’t help with protecting our life total.
- Not Dead After All: Superior to Malakir’s Rebirth when cast, but it’s important to note that Mono Black Necrodominance is not a true Scam deck, as we lack aggressive follow-ups, so we’d rather have the added utility of being a land instead of additional point of power.
- Other MDFCs (Zof Consumption, Bloodsoaked Insight): It might be useful to have access to a fifth weaker Soul Spike or an unconventional draw spell. However, their land part entering tapped can often be a significant drawback.
- Red splash in the sideboard: Offers the option to play removal spells to deal with a variety of permanents (such as Molten Collapse or Hidetsugu Consumes All) or a versatile hate card like Rakdos Charm.
Although the MH3 metagame is still relatively new, I have some preliminary thoughts on which build might be effective in certain metagames. Take these suggestions with a grain of salt:
- Profane Tutor and a sideboard full of silver bullets are effective against spell-based combo decks (Living End, Storm, Goryo) but less so against Nadu, Tron, and Eldrazi.
- A red splash seems beneficial when facing Nadu and Energy.
- It’s possible to splash other colours as well. For example, a green splash for Abrupt Decay, Revitalizing Repast, and sideboard options is something we can see from time to time.
- The mono black version without Profane Tutor appears to be fairly stock, so it’s best not to experiment with different strategies unless you have a clear reason to do so.
Important plays and tricks you must know
- The legend rule can trigger revolt for Fatal Push.
- Soul Spike and March of Wretched Sorrow can target other things than your opponent or their creatures; for example, you can target your own creature if you need life against Goblin Bombardment or when the board is empty.
- Phyrexian Tower can sacrifice Grief, Boggart Trawler, and Orcish Bowmasters before their own ETB trigger resolves. Pay close attention to when this sequencing matters, such as against a Phlage or in a mirror match to avoid life gain from an opponent’s removal.
- Necrodominance prevents us from decking by skipping our draw step.
- Malakir’s Rebirth can be used before sacrificing a creature with Phyrexian Tower.
- When facing Orcish Bowmasters, it’s often wise to cast discard spells first.
- If your opponent controls an Orcish Bowmasters and you have Sheoldred, Sheoldred’s triggers will resolve first during your opponent’s turn and second during yours (due to active/nonactive player rule).
- Due to the threat of Soul Spike, when you activate Necrodominance and then pass priority, opponents often proceed to their turn and allow you to discard rather than taking action at the end of your turn.
- This is not a Scam deck, so don’t double Grief on turn one just because you can. Do so only if it’s necessary or if you need to take the aggressor’s role.
Sideboarding
General notes
- Never cut The One Ring or Necrodominance unless you’re facing an extremely aggressive deck or an all-in combo deck, such as Burn or Neoform.
- You may consider sideboarding out Soul Spike if you don’t need to accelerate Necrodominance and finish the game quickly.
- Remember that MDFCs are also spells and can be used in place of non-MDFC cards you sideboard out. For instance, Fell the Profane serves as a good removal spell against control after you’ve cut Fatal Push or March of Wretched Sorrow.
- In general, you should cut the whole playsets rather than trimming one of several cards, as the deck requires consistency in executing your chosen strategy.
- Grief is not effective for grinding or controlling the game.
- Sheoldred should almost always be kept in the deck.
- When cutting cards, often ask yourself what’s your best interaction in the matchup, and what’s your plan if you can’t assemble Sheoldred with Necro early in the game.
- Never sideboard out a land or an MDFC.
Sideboard options
Thoughtseize
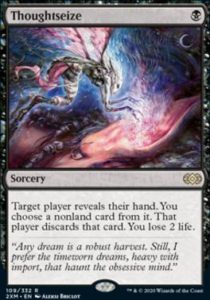
If you don’t already have 5 or 6 discard spells in your main deck, it can be useful to include a few more in the sideboard to ensure consistent access to discard and hate cards in your opening hand postboard. Thoughtseize is effective against many decks, though it’s less useful against Scam, Jund Saga, Energy, or other aggressive/fast midrange strategies, as it often replaces an unnecessary removal spell or Orcish Bowmasters.
Break the Ice
This is a dedicated tool against Eldrazi and Tron variants, which are generally close or slightly unfavourable matchups in game one. These decks are quite popular, and Break the Ice can also be useful against Urza’s Saga (especially against Amulet Titan or even Nadu, depending on your 75). I recommend at least two copies, possibly four if you’re not running Thoughtseize or Damping Sphere in the sideboard.
Damping Sphere
A versatile tool against Eldrazi, Tron, Storm and some fringe combo decks like Twiddle Storm or Living End. Its inclusion depends on the balance of your sideboard or if you need space for other matchups, as it’s rarely the optimal choice in any matchup. Sphere being symmetrical is a real downside in the deck, as you often want to cast multiple spells on one turn or use Phyrexian Tower. Keep in mind that this card isn’t great in multiples, so don’t include too many unless you have a specific reason.
Disruptor Flute
The main advantage of this card is its flexibility, allowing you to cast your hate card at the last moment against a Shuko, cascade spell, The One Ring or a tutor. However, the number of targets you want to get with it is quite low, and the card is often used against The One Ring. I wouldn’t recommend it unless you have a specific strategy in mind.
Soulless Jailer
This is the best card you could reasonably play against Ruby Storm and is also powerful against Goryo’s Vengeance and Living End. However, it’s less versatile than Damping Sphere against Storm-like decks (useless against Neoform or Twiddle, for instance). It’s likely the best pick considering the current metagame, especially if you’re already running Break the Ice against Tron. However, it might not be needed if you already have other graveyard hate. Keep in mind that it still allows your opponent to use Wish.
Necromentia
The most versatile tool against combo decks, I find it particularly effective right now because every unfair deck relies on one specific card to function (Nadu, Wish, Goryo’s Vengeance, Living End, Lotus Field). However, drawing a second copy is terrible, so I recommend a maximum of two. Don’t forget it can be pitched, unlike artifact hate cards.
Dauthi Voidwalker
Once a staple before MH3, this card doesn’t perform well against many new strategies: Kozilek’s Command can kill it, Phlage can deal with it before it’s sacrificed, etc. It’s probably the best graveyard hate available after Soulless Jailer, but it struggles to regain its former status as a generically good sideboard card. I wouldn’t recommend playing it.
Leyline of the Void, Surgical Extraction, Cling to Dust
These are various forms of more or less specialised graveyard hate. Cling to Dust doesn’t synergise well with Necrodominance, making it mediocre. Currently, decks that rely on the graveyard (Storm, Goryo’s Vengeance, Living End) can be attacked from many angles and by using cards with other applications. I wouldn’t recommend using any of these unless decks like Dredge, Hollow One, or Vengevine make a comeback.
Force of Despair, Damnation, Toxic Deluge
Mono black has access to many board wipes. I believe Toxic Deluge shouldn’t be played unless you plan to cast it by paying just a few life points, as your life total is already under significant pressure from Necrodominance and The One Ring. Damnation is slightly costly but works well with Profane Tutor, though it’s probably not great without it. Force of Despair is a specific tool against Nadu (it can kill it for zero mana without triggering it) and can be useful in a few other matchups. I’m neither a strong advocate nor a critic; it does the job if you have another plan against Nadu, but it doesn’t feel like a sideboard staple.
Invoke Despair
I tested this as kind of a fifth copy of Soul Spike, but it was pretty bad. It’s only powerful if you’ve already dealt with most of your opponent’s board, you have time to cast it, and you’re struggling to win otherwise. It’s not useless, but there are too few scenarios where it shines.
Engineered Explosives
A way to deal with Urza’s Saga and tokens, this card is excellent against both Nadu and Energy because you can eliminate specific threats and then clear the rest of their board with Explosives. It’s one of the only ways mono black can destroy Pithing Needle, Vexing Bauble, and Static Prison. I think the card is essential, and to be honest, I’m currently testing a red splash version to play other similar cards. It could be worth playing multiple copies in mono-black.
Sheoldred, March of Wretched Sorrow, Fatal Push, Orcish Bowmasters
Due to deckbuilding constraints, you might play fewer than four copies of these cards in the main deck. I recommend having at least a third copy of each in your sideboard, and probably a fourth as well. Profane Tutor makes it a bit trickier, especially when it comes to expensive cards like Sheoldred, but without it in the mix, I’d be hard pressed to not register a full playset of each of those cards.
Hidetsugu Consumes All
This card is an odd mix of board wipes and Engineered Explosives. Its main advantage is its ability to kill multiple threats out of Energy and Nadu, but it also deals with Shuko, Vexing Bauble, and Pithing Needle. It’s not the best sweeper against Energy, but its efficiency against Nadu makes it valuable. Other chapters offer some additional utility, such as exiling Phlage, rendering Shifting Woodland useless, and creating a decent clock. You could use Malakir’s Rebirth on the back side to restart the Saga at instant speed, in conjunction with removal or Phyrexian Tower.
Rakdos Charm
The versatility of this Charm helps fill some gaps in your deck, but the primary reason for its inclusion is to kill a Nadu player when they attempt to combo. They almost always need to create a swarm of insects in the process, and you can cast it at instant speed to kill them, just be mindful of potential Chord of Calling targets in response to it. Shuko, Vexing Bauble, Talisman, Trinisphere, and Ruby Medallion are common targets as well, and it can “counter” Goryo’s Vengeance or Past in Flames. While not a staple, its flexibility is quite valuable at the moment.
Culling Ritual
Very similar to Hidetsugu Consumes All, without the additional chapter effects, but it can create a powerful sequence by following it up with a threat on the same turn. It’s one of the best board wipes you can hope for against Energy, as it kills every creature (except Phlage and Fable) while dealing with Static Prison, Goblin Bombardment, and Chthonian Nightmare. I’m not a fan, primarily because I think I need a board wipe as early as possible against Energy and Nadu, and I like the clock that Hidetsugu provides, which can turn it into a decent threat after the early disruption.
The Meathook Massacre
I believe this is the best sweeper available for the deck, because it helps Necrodominance function smoothly and acts as a soft counter to Goblin Bombardment. However, the fact that it struggles to kill Nadu and Constructs and doesn’t deal with Shuko makes it one of the worst board wipes against Nadu. I expect this card to see more play in the coming weeks, assuming the Bird doesn’t last until the end of August.
Sideboard guide cheat sheet
As we’re trying to further evolve our content to be more convenient and useful for you, we’re going to implement some changes to how our sideboard guides are presented. You can still find the Cheat Sheet with the exact numbers I settled on for today above, and below you can find more evergreen guidelines as to which cards work and which don’t in each matchup. This way, you can take more from these plans even if your list isn’t exactly the same as mine.
I decided to write down ins and outs to both Mono Black and Black splash Red versions. In the blind or the metagame infested by Energy, I would pick BR build, but if your local metagame is more combo-oriented, mono black with tutors may be a better choice. I hope you’ll find it useful and you’ll be able to better prepare for the expected metagame at your local RCQ.
BR Necrodominance
Mono Black with Profane Tutors
Sideboard guide
Eldrazi Ramp
Cards that are bad: Fatal Push
Cards that aren’t great: Orcish Bowmasters, March of Wretched Sorrow
S-Tier sideboard cards: Break the Ice, Thoughtseize
Good sideboard cards: Necromantia, Damping Sphere
Marginal sideboard cards: Rakdos Charm
Trap cards: Culling Ritual, Hidetsugu Consumes All
You should aim to defeat your opponent as quickly as possible, as Emrakul, the Promised End can either kill you through Necrodominance or at the very least waste a lot of resources with Soul Spike and March of Wretched Sorrow. Use discard spells to slow them down in the short term; the clock from Orcish Bowmasters is less significant. The key is to protect Sheoldred by discarding Devourer of Destiny and Kozilek’s Command or by setting up her with Necrodominance. This is one of the matchups where Grief scamming is highly effective – remember that Malakir’s Rebirth can be used to protect Sheoldred by allowing you to kill it yourself with Fatal Push or Phyrexian Tower.
Postboard, the primary strategy remains a swift kill, but you now have Break the Ice or Damping Sphere to disrupt their lands. Interact with their lands when it’s likely they won’t be able to cast a critical spell on their next turn. Overloading Break the Ice can serve as an alternative win condition, and sometimes you can wait for your opponent to tap their Ugin’s Labyrinth before destroying it, ensuring you strip them off of the exiled card.
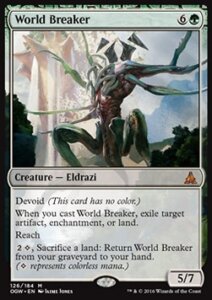
Some games may devolve into scrappy affairs after multiple discards or mulligans, leading to a grindy situation where you need to get rid of Sowing Mycospawn or World Breaker in order to push through with an Orc Army. Be mindful of this scenario, as racing with Sheoldred alongside Necrodominance or The One Ring might become difficult, and you may need to adjust your approach.
Eldrazi – Through the Breach
Cards that are bad: Fatal Push
Cards that aren’t great: Orcish Bowmasters, March of Wretched Sorrow
S-Tier sideboard cards: Break the Ice, Thoughtseize
Good sideboard cards: Necromantia
Marginal sideboard cards: Rakdos Charm, Damping Sphere
Trap cards: Culling Ritual, Hidetsugu Consumes All
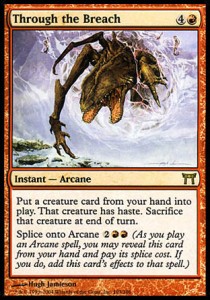
This matchup is quite similar to Eldrazi Ramp, as it’s difficult to interact with Through the Breach (and the threats it enables in Ulamog, the Defiler or Emrakul, the Aeons Torn). Your best approach is to win as quickly as possible and use discard spells to eliminate any threats they might play on their next turn. Grief scamming is highly effective in this context, and Orcish Bowmasters are more valuable than usual for dealing consistent damage. If the game drags on, be mindful of whether you can survive an attack from a hasty Eldrazi, as managing to untap after that will likely lead to a victory.
Postboard, you have some cards to interact with their lands and possibly a few Necromentia to directly deal with Through the Breach. It’s important to stay cautious, especially when they reach five mana. After that point, focus on being proactive rather than dealing with their smaller Eldrazi threats. Overloading Break the Ice is rarely a viable win condition in this scenario, and Damping Sphere can sometimes be underwhelming, so don’t place too much emphasis on these cards in your opening hand or after discarding for hand size.
There is no secondary plan in this matchup, as Through the Breach can sometimes end the game with minimal setup regardless of your actions. Be particularly vigilant about the hard casting of Emrakul or Ulamog in the late game.
Energy
Cards that are bad: Thoughtseize, Grief
Cards that aren’t great: —
S-Tier sideboard cards: The Meathook Massacre, Path of Peril, Hidetsugu Consumes All, Curling Ritual
Good sideboard cards: Damnation
Marginal sideboard cards: Graveyard Trespasser, Plague Engineer
Trap cards: Soulless Jailer
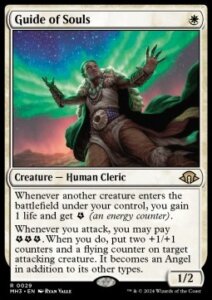
In this matchup, the aim is to play a control game until you can stabilise with Sheoldred and The One Ring or Necrodominance. Given the nature of your deck, you won’t be able to address every threat that Energy presents (as they often deploy two threats per card), so it’s essential to focus on the cards that enable their power plays. Prioritising getting rid of Guide of Souls, Ajani, Nacatl Pariah and Ocelot Pride as early as possible is generally a good strategy. Be mindful of Galvanic Discharge, which can kill a Cat token and flip Ajani at instant speed. When you begin drawing a significant number of cards, remember that Sheoldred plus discard spells will likely secure your victory in the late game. Therefore, using Soul Spike to eliminate any board threat is more effective than trying to go face against a deck with Guide of Souls and Phlage. Be cautious of Blood Moon; consider delaying your fetch lands slightly, rather than fetching a surveil land on turn one. Not revealing a Swamp in hand can also bait them into over prioritising Blood Moon.
The overall plan remains the same postboard, but you should have several sweepers or similar tools (such as Hidetsugu Consumes All, Culling Ritual, or Engineered Explosives) to clear multiple threats and Static Prisons in one go. Aim to kill or discard threats that you can’t deal with using your board wipes, or focus on those that buy you the most time if you’re still looking for one of your pieces.
If you find that you can’t maintain sufficient control over the game, attempting to race your opponent is often a losing strategy. However, it may still be a better option than simply waiting to lose over the course of a few turns. To be aggressive, you should ideally have multiple Orcish Bowmasters, and a Grief or Sheoldred on turn four.
Goryo
Cards that are bad: March of Wretched Sorrow
Cards that aren’t great: Fatal Push (if they don’t run Psychic Frog)
S-Tier sideboard cards: Thoughtseize, Surgical Extraction
Good sideboard cards: Necromentia, Rakdos Charm, Soulless Jailer, Graveyard Trespasser
Marginal sideboard cards: Fatal Push (for Psychic Frog)
Trap cards: —
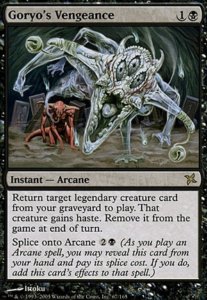
First and foremost, it’s quite challenging to deal with the card Goryo’s Vengeance directly, but you have some options in discard spells and Boggart Trawler. However, prioritising your own proactive game plan is often the most effective strategy. Don’t be overly concerned with their ephemerated Grief; instead, focus on deploying all your threats. Be mindful of their Solitude, which can thwart your Soul Spike kill, and be cautious of any Psychic Frog, as it can make grinding easy for them. Discarding their Atraxa or Griselbrand is a good idea if you can cast Boggart Trawler. Casting Orcish Bowmasters during their upkeep is a useful tactic to force them into making suboptimal decisions.
After sideboarding, with some exile effects and additional discard spells, the combo should be manageable in the short term. The overall strategy remains the same, but you can feel safer before deploying a value engine. Nevertheless, be aware that their own discard spells can significantly alter the outcome of a turn when played (for instance, if you are slow-rolling something or if your third land is an MDFC).
The only card that can change your game plan is Psychic Frog. Use Fatal Push as soon as possible, or carefully set up your Soul Spike or March of Wretched Sorrow. If you cannot manage it, simply stay proactive and hope for the best.
Jeskai Control
Cards that are bad: Fatal Push
Cards that aren’t great: March of Wretched Sorrow
S-Tier sideboard cards: —
Good sideboard cards: Thoughtseize
Marginal sideboard cards: Graveyard Trespasser, Surgical Extraction, Necromentia
Trap cards: —
The primary objective here is to establish a value engine, as your opponent only has four copies of The One Ring and lacks cards like Sheoldred or Bowmasters that can counter it once activated. Therefore, take your time, make your land drops, and delay playing your discard spells or threats until the moment when your opponent must start respecting the threat of Necrodominance and your own Rings. You can afford to wait until turn 4 or 5 to scam Grief and follow it up with another threat. Be cautious of Phlage, as it can significantly alter the value of your Bowmasters. Your opponent might be inclined to counter them immediately, but with Phlage, they may opt to remove it later on instead.
The game plan remains the same postboard, although you should have fewer mediocre removal spells and more hand disruption. Necromentia should typically target Ring or Phlage, or Counterspell if you need to clear the way for your threats. MDFCs are crucial for managing the nuanced situations you’ll encounter in a slow, grindy game where both decks are trying to set up a key turn. Avoid using them as lands without double-checking – for example, Malakir’s Rebirth is particularly useful if you have a creature-based plan, while Fell the Profane can prevent you from dying to an instant speed Incarnation.
If your hand appears unsuitable for a long game, it is often better to deploy all your threats as quickly as possible and hope to draw into something powerful rather than waiting, as your opponent will likely now that your hand isn’t great if you don’t play anything meaningful in the first four or five turns of the game.
Living End
Cards that are bad: Fatal Push
Cards that aren’t great: Orcish Bowmasters, March of Wretched Sorrow
S-Tier sideboard cards: Soulless Jailer, Necromantia
Good sideboard cards: Rakdos Charm, Damnation, Thoughtseize
Marginal sideboard cards: Surgical Extraction, Damping Sphere
Trap cards: —
This matchup is somewhat unconventional, as both decks have the potential to disrupt the other’s strategy significantly. However, the general game plan remains the same as always. It’s essential to delay the first Living End and to resolve Necrodominance or The One Ring before setting up a Sheoldred turn. Living End causes a significant amount of self-inflicted damage through cycling and its mana base, so a couple Soul Spikes can often be sufficient to secure victory. It’s advisable to use Grief as early as possible to remove key black cards to strand their Grief in hand, or to target a cascade spell. Additionally, be prepared to discard any counterspells that might return. March of Wretched Sorrow can be invaluable in buying an extra turn, so don’t underestimate its utility.
The game plan remains largely the same postboard, though you’ll have better interaction in place of Fatal Push. Be cautious of their Force of Vigor, particularly when it comes to your Necrodominance or sideboard hate like Soulless Jailer. Damping Sphere is a solid choice simply because it helps to slow down the game. A scammed Grief could be effective as a beater, as several cards can buy you time before Living End is resolved postboard.
Avoid deploying your creatures too early, as they likely won’t be able to finish the job alone. However, if you have a way to remove them, it can be beneficial to inflict consistent damage both before and after Living End resolves. Also, remember that Living End often cycles at sorcery speed to find land drops or Grief, allowing Boggart Trawler to exile their graveyard before the critical turn.
Nadu
Cards that are bad: Orcish Bowmasters
Cards that aren’t great: March of Wretched Sorrow
S-Tier sideboard cards: Force of Despair, Necromentia, Rakdos Charm
Good sideboard cards: Hidetsugu Consumes All, Culling Ritual, Abrupt Decay, Thoughtseize
Marginal sideboard cards: Plague Engineer
Trap cards: Surgical Extraction
The game revolves around slowing down your opponent’s mana development, managing Nadu as soon as possible, and taking your time to utilise your value engine, as you often cannot close the game quickly. It is generally better to save March or Soul Spike to deal with a second, third, or fourth Nadu rather than using them immediately on a different target. You rarely lose to a single Saga or Nantuko in game one, as you have plenty of removal. Don’t be afraid to get greedy if they don’t have any creatures on board, or only one; you can risk giving them two or four triggers from Nadu with Shuko. Typically, you should respond with removal to the first Nadu trigger, though there are rare exceptions where you might interrupt the combo, only for them to have a second Nadu in the same turn. Be mindful of these specific windows.
The sideboard should primarily focus on interacting with their engine, ensuring they cannot assemble their combo, even with cards like Veil of Summer or Spell Pierce. To play around these instants, you can try to prolong the game to the point where Pierce isn’t as effective, and try to stockpile interaction to power through Veil. Alternatively, you can follow a different approach, such as deploying a draw engine or Sheoldred earlier than expected. Having tools to destroy Shuko or Vexing Bauble is also powerful, as opponents tend to play these early to avoid discard spells. Additionally, Veil of Summer doesn’t work against cards like Engineered Explosives or Hidetsugu Consumes All.
Since you may board out some, or many, cheap removal spells (like Orcish Bowmasters and March), you could struggle more against Insects or Constructs, so having another plan for dealing with them is crucial. You don’t need to manage them immediately, as long as you are confident that the risk of the combo being assembled remains low. Break the Ice is a decent option if your opponent plays a list with four Urza’s Saga or if your main deck contains mediocre spells against them (Profane Tutor is particularly poor against Nadu, as you need to interact frequently and quickly).
Necrodominance

Cards that are bad: —
Cards that aren’t great: Fatal Push
S-Tier sideboard cards: —
Good sideboard cards: Thoughtseize, Erebos, God of the Dead
Marginal sideboard cards: The Meathook Massacre
Trap cards: Necromentia, Surgical Extraction
The mirror match hinges heavily on resolving and leveraging Necrodominance or The One Ring first. When deciding on your starting hand, prioritise lands (Phyrexian Tower is particularly useful) and either Necrodominance or The One Ring. Following this, look for cards that can discard or contest these on the board (such as Bowmasters and Sheoldred). While it’s important to have removal in your deck, they aren’t crucial in your opening hand. Mulliganing can be risky due to the potential for discard (especially against MDFCs), but you need to present a powerful strategy, such as discard combined with a threat or a series of threats. It’s essential to “discard check” or “removal check” your opponent swiftly; this isn’t a grindy matchup like the 2012 Jund mirror. Double Grief is effective for discarding MDFCs or multiple threats, Phyrexian Tower can enable significant strategy shifts, and surveil lands are excellent for helping you sculpt a specific hand. One lesson from the Pioneer Red Black mirror match that applies here as well: damaging their life total isn’t a direct objective, but it can pressure your opponent into making poor decisions and diminish the effectiveness of their draw engines. Presenting a potentially lethal situation with Soul Spike or dealing extra damage at a critical moment can dramatically alter the quality of your opponent’s next move.
Postboard, the strategy remains the same. Swapping a few Fatal Pushes for better removal or discard options is advisable. The deck isn’t prevalent enough to warrant specific sideboard cards like Erebos, God of the Dead.
Avoid relying too heavily on your own threats without protection, as a March of Wretched Sorrow and The One Ring can quickly turn the game against you. It’s wise to keep Malakir’s Rebirth and Fell the Profane in hand for as long as possible. If the game isn’t decided by Necrodominance or The One Ring, grinding with Bowmasters and Sheoldred is a common approach until someone eventually draws a value engine, which may prove ineffective depending on how much damage those prior creatures dealt.
Prowess
Cards that are bad: —
Cards that aren’t great: Orcish Bowmasters, Necrodominance
S-Tier sideboard cards: Hidetsugu Consumes All
Good sideboard cards: Graveyard Trespasser, Damping Sphere
Marginal sideboard cards: Thoughtseize
Trap cards: Soulless Jailer, Surgical Extraction
In this matchup, you must adopt a defensive stance and play as cautiously as possible. Wait until you have a March of Wretched Sorrow, Soul Spike, or Sheoldred in hand before deploying Necrodominance, and be particularly mindful of their powerful turns involving Mutagenic Growth and Lava Dart. The matchup isn’t too challenging as long as you give due respect to their strategy. For instance, it’s wise to offer an early trade with Orcish Bowmasters because in the mid-game, they can use Lava Dart with flashback to kill it without much trouble. Sheoldred is generally safe if they have only one mana and aren’t playing the energy version. However, any mistake in timing the lifegain with Sheoldred can lead to a loss.
This is one of the few matchups where Necrodominance is less effective; if you’re using the Profane Tutor version, it’s worth keeping one copy to maintain access to the combo with Sheoldred. However, postboard, the deck shifts to a Sheoldred/Ring control strategy. Hidetsugu could also be a strong option if played immediately after killing a Slickshot Show-Off, as it can clear their other creatures and weaken the potential of Dragon’s Rage Channeler and Underworld Breach.
It’s generally not advisable to double Grief against them; their deck is very consistent, and losing life for a weak blocker isn’t great. Unfortunately, gaining a large amount of life (50 or more) is not a guaranteed win condition due to the threat of Underworld Breach or unchecked Prowess creatures, so be cautious about decking yourself.
Storm
Cards that are bad: March of Wretched Sorrow
Cards that aren’t great: Orcish Bowmasters
S-Tier sideboard cards: Damping Sphere, Soulless Jailer
Good sideboard cards: Necromentia, Rakdos Charm, Thoughtseize
Marginal sideboard cards: Surgical Extraction, Graveyard Trespasser
Trap cards: sweepers
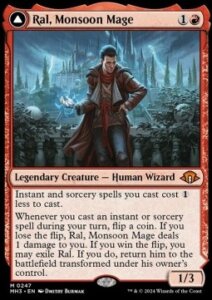
I believe the matchup is roughly even, because while Necrodominance offers versatile interaction, relying on a strategy that requires multiple turns to establish a clock can be suboptimal against an opponent capable of chaining together a win or at least a significant advantage on every single turn. Double Grief is highly effective, and deploying Sheoldred as early as possible is the best way to apply pressure, but you must also be mindful of Ral. You can afford to use Necrodominance more aggressively, as your opponent can easily deal 40 damage with Past in Flames or Empty the Warrens. It’s important to remember that they have ways of beating you through The One Ring (such as Alchemist’s Gambit or Thassa’s Oracle), so protection is largely ineffective in this matchup.
Postboard, you gain more tools to counter their combo. Graveyard hate can significantly reduce the power of Past in Flames, but you need to use it before Past in Flames resolves, so they can still use its flashback a few turns later. Necromentia should generally target Past in Flames or Wish, but the information you have at the time could lead you to choose differently (for example, if Necromentia removes a key card from their hand immediately). You shouldn’t worry too much about Empty the Warrens. Delaying the use of Damping Sphere or Soulless Jailer until after a discard spell might be a good idea, but the risk of giving them a full turn to find an answer or secure a win is often too great. Rakdos Charm can be used to destroy a Ruby Medallion right after it’s cast, but it might be worth waiting until they commit to Past in Flames, though such opportunities are rare.
The game plan can vary significantly based on the draws and the new information you gather about your opponent’s hand. You should respect the threats you can manage, and if you can’t, it’s better to adopt the most aggressive strategy possible, even if it only gives you a low chance of winning in those situations.
Tron
Cards that are bad: Fatal Push, March of Wretched Sorrow
Cards that aren’t great: —
S-Tier sideboard cards: Break the Ice, Damping Sphere
Good sideboard cards: Thoughtseize
Marginal sideboard cards: Rakdos Charm, Necromentia
Trap cards: Surgical Extraction
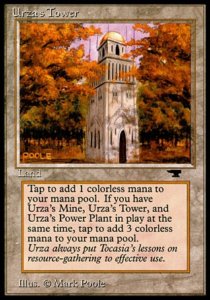
This matchup is quite similar to Eldrazi Ramp; you should aim to kill your opponent as quickly as possible. Use discard to hinder them in the short term. Orcish Bowmasters can be effective at dealing with The One Ring if you have the time to cast it. Protecting Sheoldred, either by discarding Devourer of Destiny and Kozilek’s Command or by slow-rolling it with Necrodominance, is crucial. Double Grief is particularly strong here. Remember that Malakir’s Rebirth can protect Sheoldred by allowing you to sacrifice it with Fatal Push or Phyrexian Tower. The green version with Sowing Mycospawn can be more challenging, because they can keep more hands with a solid turn three.
Postboard, finishing the game as soon as possible is still crucial, but now you have Break the Ice or Damping Sphere to disrupt their lands. Target their lands when they are likely unable to access a crucial spell on their next turn. Overloading Break the Ice can serve as an alternative win condition, and sometimes you can wait for your opponent to tap their Ugin’s Labyrinth before destroying it, ensuring you strip them off of the exiled card. Profane Tutor is less effective in this matchup, since early interaction or establishing a clock is more critical.
Some games may become scrappy after several discards or mulligans, leading to a grindy scenario where you need to kill Sowing Mycospawn or Devourer of Destiny to push through with your Orc Army. Be cautious of situations where racing with Sheoldred and Necrodominance/The One Ring is challenging, and adapt your strategy accordingly.
UB Murktide
Cards that are bad: —
Cards that aren’t great: Soul Spike
S-Tier sideboard cards: —
Good sideboard cards: Thoughtseize
Marginal sideboard cards: Graveyard Trespasser
Trap cards: Surgical Extraction
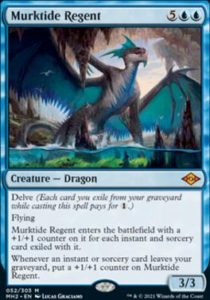
In this matchup, both decks run a similar density of interaction and threats, so the games are often determined by how well you anticipate and respond to your opponent’s actions. Common strategies include slow-rolling Orcish Bowmasters to ensure you have Malakir Rebirth available, waiting to draw discard or a second payoff before deploying Necrodominance or The One Ring, and avoiding playing MDFCs as lands when you already have three. One significant exception is that you must deal with Psychic Frog quickly if it resolves. Murktide Regent is less of an issue, as it tends to come into play later and doesn’t snowball as significantly as Frog.
Take your time to consider what might happen if your opponent responds to your next spell and how it might deplete their resources. For instance, if you suspect your opponent doesn’t have any Fatal Push in hand, you might play multiple creatures to force them to use their counterspells before casting Necrodominance or The One Ring.
After sideboarding, the matchup remains largely the same. Soul Spike becomes relatively ineffective due to the generally fair nature of the game (unless you have an exceptionally strong opening with Grief and Phyrexian Tower). You should also be wary of Consign to Memory, as it can make your opponent’s deck better at answering The One Ring and Grief.
Inferring what their hand might be is crucial, as recognising when your opponent is low on resources will often prompt them to play threats more aggressively before you can topdeck something significant, and vice versa.
