

If you are new here, don’t forget to check our Discord Channel. It’s free for everyone!
If you liked this primer and want to read more high level Blink content, check out my Esper Blink sideboard guide.
Introduction
What is Esper Blink?
Esper Blink is a variation of WB Blink that utilises one of the most powerful and most popular blue cards in the format – Psychic Frog and Consign to Memory. Of course blue does not have to be limited to those two cards, but they are the most popular choices. Because the splash is fairly minor, it doesn’t disrupt its gameplan. It utilises some of the best, most efficient spells in Modern, like Thoughtseize, Fatal Push and Solitude, combined with blink effects to gain card advantage and commanding board presence early in the game. It started gaining traction with the printing of Overlord of the Balemurk, as it quickly turned out that pairing it with Phelia, Exuberant Shepherd and Flickerwisp is an effective recipe for a powerful body at the effective cost of two mana along with two extra creatures from Overlord triggers. Not too shabby, right? Shortly thereafter Ketramose, the New Dawn was printed in Aetherdrift. This was another boost to the deck as it provides immense advantage from exile/blink effects and creatures leaving the battlefield. And the rest is, as they say, history.
WB vs Esper
Why even bother adding another colour and changing the deck if WB Blink is so successful and popular? Well there are several reasons to at least try it and I will explain them one by one. First of all I started to test just to see how it performs and I highly encourage you to do so as well. Some play patterns and game styles fit you better, some not. But let’s face it, this is a lousy excuse. More importantly I started having problems with my opening hands, especially when it comes to early board presence. Phelia is great with Overlord, decent with Ketramose, quite bad on its own. And she is bad at blocking. And bad in multiples. Emperor is a nice hate card but honestly I like it more as a 4-drop, when I can activate it on the same turn. On top of that, Blink lacks a fast clock – without flickering an Overlord, it’s hard to win before turn six or seven. I was looking for a different two drop to fix those issues, and Psychic Frog fits the bill perfectly – it’s good at blocking, good in multiples, utilises dead cards, clocks fast and synergises perfectly with Ketramose. I was considering additional Orcish Bowmaster and other cards but none of them are even close to Frog when it comes to the power level. Additionally, I usually had a third color somewhere in our deck already – either for Prismatic Ending or some sideboard cards (Ashiok, Dream Render, Wear // Tear, etc.). The addition of the third colour for a few sideboard cards is not that painful. Changing the deck to support the splash game in and game out is a bit of a different story and I feel sometimes that my manabase costs me. Yet I think this is a fair price to pay. Coming back to the WB versus Esper discussion – I already played Ashiok, Dream Render to fight Amulet Titan and my splash colour was blue. I added another shockland, changed one surveil land and all of the sudden I had a three colour deck instead of a two colour one, so ultimately the price was not that high.
Last argument in favour of Esper is the expected metagame – which decks you face, which decks you want to beat and how difficult it is to beat them with your current decklist. If your metagame is full of Energy, Blink, random aggro decks or Blood Moons, blue splash might not be at its best. However, if you face colourless decks (Broodscale Combo, Eldrazi Ramp, Eldrazi Aggro), Amulet Titan, Belcher and other combo decks, give Esper a chance as it has a better matchup against all of them. The combination of good early clock, card advantage and countermagic in the form of Consign, gives us a lot of flexibility against various strategies.
Strengths
Indestructible, lifelinking Ketramose, combination of Push and Solitude, a threat of blinking Overlord early in the game and a lot of card advantage gives this deck a significant advantage over every deck that relies on creatures. Even though BW/Esper Midrange decks are not known for their speed, the best openings (blinking Overlord on turn three) can put a considerable clock on any opposing deck. With the addition of Psychic Frog we can kill much faster and utilise card advantage to close out the game. Ketramose requires exile effects to show its real power, but we accidentally have plenty of those. The addition of maindeck Relic of Progenitus gives us the option to draw multiple cards with Ketramose’s ability. Finally, maindeck discard helps win against combo.
Weaknesses
If your opponent does not play creatures you have upwards of ten dead cards in the maindeck. If it happens that they don’t rely on other types of nonland permanents, the number of dead cards increases even further. If the matchup forces us to kill the opponent fast, the situation gets even more complicated. Due to this, decks like Amulet, Belcher, UWx Control are by definition bad matchups, at least game one. Psychic Frog definitely helps closing games faster, digging for whatever we need or simply discard useless removal spells to increase the clock. This effect is more significant postboard when we cut bad cards. This paired up with draw engines and discard spells can help us turn around some bad matchups.
My current list
If you can’t see the link or want a downloadable version, click here.
If you can’t see decklists and links, it’s likely because you didn’t accept cookies. Doing so is mandatory for the website to work correctly.
Primer
The main game plan and major deckbuilding decisions
The main game plan revolves around blinking Overlord, reducing your opponent’s board and finishing the game with efficient threats providing card advantage. Because of that, the deckbuilding process starts with maximising Ketramose and the probability to have an active Overlord as soon as possible. The former is fulfilled by maindecking Relic of Progenitus, Prismatic Ending or March of Otherworldly Light, Psychic Frog, Emperor of Bones and Solitude. The latter requires us to play some number of Phelia and Flickerwisp. In the WB version the usual split is 4/3 or 3/2, respectively, as both creatures are quite mediocre on their own. In Esper where you have access to Psychic Frog the split is 3/2. Fortunately, all blink effects, which are so crucial for Overlord, also trigger Ketramose, which creates a nice overlap and ensures that we can get some advantage from blinking even without Overlord on the table. Both Relic and Frog are a repeatable source of card advantage paired with Ketramose. You can discard cards (using Frog) to exile them and give it flying to draw with Ketramose, then repeat the process to deal more damage. Remember to always look for not to miss a lethal attack!
The mana
In Esper Blink, the manabase is a bit more tricky than in WB. First of all you need to make sure you have access to all colors. Fetchlands give us a lot of flexibility but cost us life which really adds up with MDFCs and Ketramose’s ability. Believe me, it is not difficult to die from your own life loss. Play between 10-12 fetchlands, prioritizing Marsh Flats and any mix of Flooded Strand and Polluted Delta. Surveil lands are very powerful but as they slow us down I advise to limit yourself to 2 copies – BW and UW. UB surveil is the least appealing one as we usually need a single blue source (later in the game, never on turn one) and to cast our one drops, we need white and black mana. Play one shockland for each color pair and 2-3 basics. Island is not necessary, usually two Plains and one Swamp are correct. The last 4-6 slots are filled with MDFCs and some painless WB lands. I like Bleachbone Verge as it supports turn one discard/removal and let us cast Flickerwisp on time. Concealed Courtyard is also an option, but a turn four tapland ruined my plans several times.
How to fetch
This part is really tricky as you want double white for Flickerwisp, double black for Emperor and blue for Frog. And you want to grab a Surveil land at some point. How to get this all done in appropriate order? I usually start with WB surveil as it casts close to every cheap spell in the deck. If you don’t have a Frog in hand, don’t bother with blue, at least preboard. UW Surveil is good to fetch on turn three and later. Turn three is crucial, as often it’s a double spell turn. We rarely cast three drops on curve, as we have only Ketramose and Flickerwisp, and the former is not good on an empty board. If you have Frog in hand, ask yourself a question – will you cast it on turn two? If not, then how about on turn three? If you have Phelia and Overlord, probably not. If you have removal, Relic, Ketramose – maybe you don’t have time for Frog. If that’s the case, then you can focus on WB lands and fetch blue only when you have an opportunity. However, if Frog is going to be an important part of your gameplan, I usually go for UW Surveil turn one and for Swamp/WB land turn one. This way we have all the colors and added value from surveilling. Of course the situation changes when we need to respond to an opponent’s actions. In that case consider your life total – is the matchup fast? Are you going to die from lifeloss? If so (against Burn, Dredge, Hollow One, Energy, etc.), is Frog a good blocker? Against Burn and Hollow One – definitely yes. You can lose a bit more life from lands but have a considerable body to lose less life during combat. Fetch more aggressively and deploy Psychic Frog as soon as possible. What about Energy or the less popular Dredge? Against Energy I found Frog a bit tricky – they can cast Galvanic Discharge, force you to discard multiple cards and not use any energy. Frog can die later to another Discharge, Static Prison, Phlage. Or they just fly over it. They often accumulate a lot of energy and discarding cards to protect your creature does not achieve anything. In that case Frog won’t block effectively to “give us back” the life we lost by fetching aggressively. Similarly against Dredge, which I know does not exist right now but is a good example. Their creatures come back easily and blocking one or two does not stop their board development. In that case it might be beneficial for us to use surveil lands and search for Relic, Ketramose or Solitude. Either get rid of creatures for good or get a lifelink 4/4 body. Frog might be a liability here as well.
The value engine
In Esper Blink, there are two main value engines that generate a ton of card advantage. One focuses on blinking Overlord of the Balemurk, and the second one is Ketramose paired with exile effects. Below I analysed both to help you understand where to look for the extra resources during your games.
Overlord of the Balemurk:
- Most often it acts as a two drop that is blinked by Phelia or Flickerwisp.
- Even later in the game it is often correct to cast the Overlord with impending as you might get back Flickerwisp/Phelia and blink it immediately.
- Even as a two drop which we cannot blink right away, this card still provides value, can get Solitude for tempo advantage, other creatures for extra cards or even fix our mana with Witch Enchanter or Boggart Trawler.
- Value from Overlord is really difficult to stop as countering the trigger still leaves the body on board while targeted gravehate can’t stop its mill ability. Only cards like Rest in Peace and Leyline of the Void can stop it. Fortunately, static graveyard hate gives us an easy way to get Ketramose active and draw multiple cards, which makes hating the deck out with a single card quite difficult.
- Resolved Overlord pressures opponents to act by creating card advantage which is difficult to match for most midrange and control decks. Once resolved early, we can safely sit back and wait for it to turn into a creature. This changes the dynamic of the game drastically as it is difficult to remove (no Lightning Bolt, Galvanic Discharge or Fatal Push can kill it). Even with Dismember, opponents usually get down on cards and lose life in the process while risking being completely blown out by Ephemerate.
- Overlord has the mana value five at all times and thus can’t be Spell Snared when cast for two mana. While you are on the play against a blue-based deck, prioritise casting Overlord early to sneak it under the Counterspell and establish board presence early on.
Ketramose, the New Dawn
- Ketramose is rarely played on turn three, as we want to draw cards instantly or to have it combat ready when entering the battlefield. But the value we get from it is more reliable than from Overlord.
- It works with almost every card in our deck as we have plenty of ways to trigger it.
- There are many corner cases which, if not faced before, might surprise you. The best example would be activating the second ability of Relic of Progenitus, which yields three cards total and causes you to lose two life, as Ketramose triggers twice – first time when Relic exiles itself as part of the cost, and the second time when the ability resolves. Another card that can trigger Ketramose multiple times per turn under the right circumstances is Phelia. For example, Phelia attacks targeting Flickerwisp (Ketramose trigger). When Flickerwisp comes back it exiles another card (Ketramose trigger).
- Most of your opponents will inadvertently help you turn on Ketramose. Phlage activates it almost on its own, Force of Negation and Subtlety do not trigger Ketramose but help you get to seven cards in exile. Eldrazi Ramp often puts cards in exile with Devourer of Destiny.
- Play as much as possible on MTGO as there you can easily learn when and how Ketramose trigger works. You can later leverage that knowledge during paper matches.
- Ketramose is not a “may” trigger so it forces you to draw cards and lose life. Pay attention to that. With our painful manabase we can easily kill ourselves. Consider cracking Relic of Progenitus or casting Solitude on your opponent’s turn – it is not all about value all the time! Pay attention to your opponent’s cards – Soul-Guide Lantern can force you to draw a card and lose one life. Does your opponent have a Psychic Frog? He can activate it multiple times and kill you if you have a low life total. Stop after every draw – maybe you find Solitude, exile your own creature and gain some life in the process.
- It takes more time to activate Ketramose to pressure the opponent, which can be a liability against various combo decks where the tempo is key. However there is an upside of Ketramose – you can mulligan more aggressively to hate cards, as the combination of Ketramose + Relic / Frog can get you back into the game after significant mulliganing. Even a five card hand with hate piece, Ketra and Relic/Frog is most often much better than a seven with Phelia, Flickerwisp, random removal and a bunch of lands.
Emperor of Bones
Emperor of Bones is another card that provides some serious value when set up. It is a decent two drop, great lategame card and a semi-grave hate. However it is often quite difficult to navigate the game in such a way that Emperor provides exactly what we want. As it is quite situational we don’t want too many copies. Here are some key advices and useful tricks:
- you don’t have to activate Emperor at the first opportunity. Does your opponent have removal? Maybe we can wait until their end step and activate? If Emperor dies, maybe they have to tap out and we can do something powerful on our turn.
- You can exile many creatures with Emperor and choose the best one later. Sometimes, it is better to exile the best creature at the very first occasion. Sometimes it is better to wait and keep the most juicy target in the graveyard. Why? Because Emperor might die and the best target for it is lost forever. Maybe you have another Emperor, or get this one back with Overlord. Maybe it is better to exile a certain creature with Emperor only when we are sure we can get it back.
- You can reset Emperor with Ephemerate, Phelia and Flickerwisp to use its ability once again on later turns.
Psychic Frog
A new addition that doesn’t require too much introduction. It’s the easiest way to get value in the deck – attack and draw cards. Don’t give it flying unless you have to, and when forced to do so, remove noncreature cards first. A more subtle way to get extra resources with it is its interaction with Ketramose. First of all, if you have plenty of mana and Frog + Ketramose in hand cast Ketramose first. Inactive Ketramose might be useless, Frog is a better threat on its own in that case. Moreover, if your opponent has a removal spell and you land Frog first, it can die before Ketramose enters the battlefield. If Ketramose is on the battlefield and Frog is targeted with removal you can activate it, exile cards from graveyard, and draw. Remember that you can discard multiple cards with Frog, grow it, give it flying and draw from Ketramose. And then maybe discard again, and give Frog flying again. This interaction seems weird as we discard 3 cards to draw 1, but we often have spare cards in hand and clock, a big flying body or digging for the right answer are more relevant to us. When your Frog is about to die, consider exiling a few cards from the graveyard to have Ketramose active if you draw one.
Removal
We have arguably the best removal package in the whole format. Between Fatal Push, Solitude, Prismatic Ending, March of Otherworldly Light, Phelia/Flickerwisp and Witch Enchanter, we can deal with any type of permanent.
The configuration of maindeck removal spells depends strongly on the metagame. Against Energy, especially on the draw, one mana answers are crucial as their threats are remarkably efficient. The best example of this is Fatal Push – you don’t want them against Eldrazi Ramp, but as long as Energy is by far the most popular deck, we have to respect it.
Yet you might often notice more removal in the sideboard. Why do we do that if our maindeck is already so removal dense? First of all, Energy is both an immensely popular and incredibly powerful deck. Because of that, we want to maximize our chances against them. Since Thoughtseize is rather bad against them, we need at least four cards that we can bring against Energy in our sideboard. Secondly, decks like Amulet or Affinity have permanents which are difficult to remove for us game one (Urza’s Saga, artifact lands, Amulet of Vigor, Spelunking) and we want to remove them postboard. That’s why we play cards like March of Otherworldly Light and Wrath of the Skies.
Sideboard options
Sideboard options that are worth considering are very metagame dependent. When Underworld Breach was popular those were typical sideboard choices: Deafening Silence, Drannith Magistrate, Aven Interrupter, etc. Now since this deck is banned we can focus on Energy, Eldrazi, Prowess, Amulet and others. For sideboard options against a specific deck, look at matchup analysis in the section below.
Access to blue gives a lot of new sideboard options but I would not go too fancy with those. Anything that costs double blue is a trap. If you want more countermagic, consider Mystical Dispute, less often Spell Pierce. If the metagame gets full of control or cascade decks – you can think of Teferi, Time Raveler, but I would not advise doing that right now. Most importantly though, blue gives us access to Consign to Memory, which is a stellar card against Eldrazi that vastly outperforms anything WB has access to for that matchup.
Consign to Memory
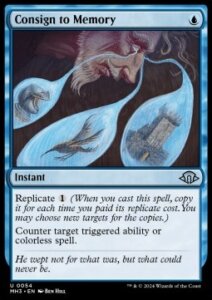
You might be surprised how many things can be countered with Consign. The easiest ones are colorless spells and their cast triggers (Broodscale, Eldrazi Ramp, Tron) – Sowing Mycospawn, Devourer of Destiny but also bigger ones like Ugin, Eye of the Storms or Ulamog, Ceaseless Hunger. Those less obvious are Cascade (mostly Living End), Miracle, cards coming of suspend (Lotus Bloom in Belcher), Primeval Titan entering and attacking, Urza’s Saga chapters, bouncelands untap from Amulet of Vigor, Phelia and Flickerwisp comeback trigger after blinking to strand the card in exile, Evoke Elementals, Ajani, Nacatl Pariah flip ability, Ocelot Pride token creation, Fable, the Mirror Breaker chapters, and many, many others.
This is both an advantage and a trap. Because the card is versatile, we have a powerful tool in our sideboard, but be careful not to overdo it. There was once a wise sentence when people overused Surgical Extraction: “I put it into my deck because my opponent has cards and I can remove them”. Later Ashiok, Dream Render fulfilled this noble role for some time: “Every opponent has a library, I can exile it and win.” No, you can’t and you shouldn’t. Surgical and Ashiok are hate cards with quite narrow uses. Coming back to Consign. Don’t get me wrong, we have multiple removal spells which are dead in many matchups postboard, but don’t bring the full playset of this card in the dark against each opponent. Think about your options, test to get experience. It is better to keep some amount of removal against Jeskai Energy Control (to exile Phlage, remove Snapcaster Mage before they can get value from Flame of Anor, kill Reflection of Kiki-Jiki) than to sideboard a playset of Consign without hesitation.
Mass removal – Wrath of the Skies, Pest Control
I value Wrath of the Skies the option to remove more expensive cards over the cycling of Pest Control. While Pest Control can answer one drops a turn faster, often waiting even a single turn means that they might run away with the game. Additionally, I value the patience that Wrath gives me. You can wait until your opponent overcommits to the board, clear most expensive creatures with spot removal and sweep the board later. If we have more mana, we store energy to discount the next copy. Another important upside of Wrath is dealing with Urza’s Saga. Removing cards like Ajani, Nacatl Pariah or Goblin Bombardment is also crucial.
Efficient removal
Fatal Push, Prismatic Ending and March of Otherworldly Light were discussed in previous sections. What about our other removal spells? Celestial Purge is dedicated for the mirror match – instant speed answer to two scariest cards in Ketramose and Overlord. It also plays nicely against both Prowess and Energy.
Orcish Bowmasters
Orcish Bowmaster You might have noticed that some players have Orcs in their 75 – both maindeck / sideboard. Since its printing this card has been very good in many decks and against many matchups (from creature decks with 1 toughness targets, through control to combo with multiple draw effects). However I have noticed that Orcs are the victim of its own success. The more popular they are, the lesser targets they have among the most popular decks. Creatures with one toughness became almost unplayable and Orcs have less and less good targets. That’s just a bit of history from my point of view. When I play Orcs and why in the sideboard? I don’t have any tutor effects in the maindeck and Orcs are not a winning card anymore, so I don’t need them against random opponents. However there are certain metagames which I expect to face (local RCQ, smaller online tournaments e.g. Modern Showcase) where Orcs might be a silver bullet. Those decks include UB Control/Frog, UWx Control, certain combo decks or decks long forgotten (Song of Creation,Infect, Humans, Elves), etc. That’s why from time to time I put a couple copies of Orcs into my sideboard. We play around ten removals in the maindeck and we have nothing to replace them with against decks like UWx Control. That is the reason I put three copies of Orcs into my sideboard. However if you expect different metagame, let’s say normal/Goldfish one, Orcs are unnecessary. Feel free to replace them with cards that are good for your expected metagame. Or in general can help in most problematic/popular matchups: Dreams of Steel and Oil, March of Otherworldly Light, High Noon or Ashiok, Dream Render.
Artifact hate
We have Prismatic Ending, March of Otherworldly Light, Witch Enchanters and Wrath of the Skies, and there is no need for more targeted artifact hate. Remember to keep your removal (Fatal Push and Solitude) in the deck as most artifact-based decks play Emry and Tamiyo. In the case of Emry, we can neutralise her through Relic as well. Similarly, Broodscale runs some artifacts, but it is still a creature deck. On top of that, Prismatic Ending and March deal nicely with most artifacts in the format while Wrath of the Skies clears the board against both mentioned decks and many others as well.
However, if you decide that you really need additional hate, the first card I’d reach for is Stony Silence. Kataki, War’s Wage has been much less popular recently, mainly because of its fragile body and the fact that its tax is not relevant against decks like Belcher. Similarly, Clarion Conqueror can be brought back with Overlord but to me it felt simply too slow against most of the artifact decks.
Hate cards against combo
Anti-spells cards (Storm, Prowess to some extent)
- Drannith Magistrate is the best hate for Storm, Cascade or Ascendancy decks but it is not played as often anymore since banning of Breach. Yet if you need a silver bullet to fight mentioned strategies, it is the best option. Can be grabbed with Overlord, and in corner cases can be saved with Ephemerate if you play those.
- High Noon is a very interesting hate piece, which partially pushed out Drannight. One turn slower than Deafening Silence, but completely shuts down Prowess which is absolutely key as this is the most popular aggro-combo deck of the format. It also hates Cascade and Storm.
Big mana hate
- White Orchid Phantom was a dedicated hate card against Amulet, Eldrazi and Tron. But since we have access to Consign to Memory, we don’t need Phantom anymore. While Consign has countless applications, Phantom has only a few upsides and in most of the cases we are happy with our sideboard upgrade.
Ashiok, Dream Render – what kind of hate is this?
This is an anti-Amulet card. It works poorly against basically any other deck in the format. Graveyard strategies e.g. Dredge, Goryo Atraxa, Living End? Too slow, one shot exile effect is too weak. Decks that utilise fetchlands, i.e. the majority of Modern? Too situational, might not lock anything as with surveil lands players tend to fetch early on. You can always get rid of some removal spells and put Ashioks in against UW Control. This is a minor upgrade, yet it is still an upgrade, but let’s face it – this card is purely for Amulet Titan. It stops all their engines, synergises well with Overlord and Ketramose. I consider Amulet Titan a very challenging matchup, especially since they moved away from Dryad of the Illysian Grove to focus more on Scapeshift. Our removal got much worse, we don’t have a clock, they can kill out of nowhere as soon as turn two, so we need some extra help. Considering all of the above, if Amulet is absent from your metagame, I’d recommend cutting Ashioks.
Other considerations
- Other cards we call in emergency when metagame changes. We don’t need you now, but we keep you in our binders: Burrenton Forge-Tender, Path to Exile, Surge of Salvation, Soul-Guide Lantern, Auriok Champion, Sanctifier en-Vec, and many others.
Discard spells
If you need tools against combo that have broader application and can be used against control decks as well, there is a long list of discard spells. Besides Thoughtseize, only a few are playable. Amongst them Duress is probably the best as most of the cards we want to discard aren’t creatures. Inquisition of Kozilek got much worse with Evoke Elementals and other cards with technically high cmc that cost less than three mana. A card I advise you to consider is Dreams of Steel and Oil – great against Eldrazi, as most of their ramp is creatures and artifacts. It can also deal with payoffs, and occasionally remove something important from the graveyard. It is a good choice for the mirror, removing Overlord or Ketramose from both hand and graveyard. Also a decent consideration against Energy – no life loss, hits almost all important cards, removes Phlage or Seasoned Pyromancer from the graveyard. It can deal with Cori-Steel Cutter, every other threat from Prowess and mess up their Delirium occasionally. Lastly, it is an additional way to deal with best draws from Zoo (discarding Scion of Draco on turn one is probably the best way not to lose this matchup).
Gameplay tips
Tips and tricks you must know
- You can Ephemerate Solitude with the Evoke trigger on the stack to exile another creature and keep your Elemental in play.
- If you have both Phelia and Overlord in hand on turn two, it’s often correct to pass with two mana up, cast Phelia in your opponent’s end step, then untap, play Overlord precombat, and blink it with Phelia to get two triggers and a commanding board presence.
- Ketramose + Relic provides a lot of cards. Obviously, you draw a card off of Ketramose every time you tap it. Activating Relic’s second ability nets you even more cards – you get two Ketramose’s triggers (one from Relic exiling itself as part of the cost, one from exiling graveyards if there are any cards there), as well as a card from Relic’s ability itself. To sum it up, activating Relic’s second ability on your turn with Ketramose in play will net you three cards and cost you two life.
- Remember that you can trigger Ketramose repeatedly with Psychic Frog. This is not an infinite loop, but it can add a significant amount of power to the board. A very useful formula for how many counters you can put on Psychic Frog this way is H + (G+H-1)/2, where G is the number of cards in your graveyard and H is the number of cards in your hand. For example, if you have 6 cards in hand and 8 cards in the graveyard, you can put up to 6 + (8+6-1)/2 = 6 + 13/2 = 6 + 6,5 = 12,5 = 12 counters, as you have to round down in the end. Remember that you will lose some life in the process to Ketramose triggers, more accurately (G+H-1)/2, rounded down again.
- Speaking of Ketramose and drawing cards, remember that it only triggers on your own turn. Because of that, you might sometimes want to use Relic or cast Ephemerate specifically on your opponent’s turn, usually when your life total is under pressure and you’re flush with cards.
- When you target Flickerwisp with Phelia, it comes back in the end step and then triggers. It means that if you target an opponent’s permanent, it will come back at the beginning of their next end step.
- Flickerwisp can target your own lands. If you target double face lands they will come back as their front side. You can also target surveil land to get an extra look.
- Flickerwisp with Ephemerate can save your permanents from being destroyed.
- Emperor of Bones can be reset with Ephemerate, Phelia or Flickerwisp. Sometimes it is beneficial to lose counters from Emperor and not attack with it but to reset it and reanimate something next turn.
- Emperor of Bones activation can be repeated. If you activate Emperor and your opponent responds with removal, you can activate again. It often doesn’t matter that Emperor dies later, as its main job has been accomplished.
- Creatures reanimated with Emperor won’t be sacrificed in the end step after being blinked.
The most frequent gameplay questions
- How often do you play longer games? Against which decks it comes up most frequently?
In some matchups this is a simple question. Against Energy for example, you are the control side. Conversely, when facing Amulet, you are the aggressor, although we often don’t present too fast a clock. But there are cases where the answer to this question is very complex. Against Eldrazi Ramp, you want to put pressure and don’t let them develop the board. However, usually we don’t just win with damage – we win by clearing their graveyard, stopping Emrakul from being cast, Kozilek’s Return from the graveyard, and so on. If your opponent plays Ugin, Eye of the Storm, you definitely prioritise either killing it or your opponent, as we rarely beat this planeswalker if it lives. Understanding when we have to stabilise the board and when we just can’t win lategame and take more risky lines to try to close out the game takes some practice, and there are no shortcuts there. - A few words about mulligans – some of your hands provide a lot of value (Phelia + Overlord, Relic + Ketramose) and even from a mulligan to five you can have a reasonable chance to win. However, we are not a combo deck. You are often going to grind games, evoke Solitude and require multiple removal spells. The matchup you are facing also impacts mulligan decisions. If you play against Energy, you can keep removal heavy hands and hope that you topdeck something good, as most of your topdecks qualify as such in this situation. Against Amulet on the other hand, you don’t keep anything that is below “really good”. You don’t want Thoughtseize, double Push, Solitude and 3 lands. You just don’t have time to wait and topdeck a threat. Even a four card hand could give us a better shot at winning than a bad seven.
- With Energy being the premier aggro deck of the format, we can often pay life with our lands and don’t bother that much. Their only reach is Phlage, as they don’t even play Lightning Bolt so you won’t die to burn spells. However, sometimes our starts will put us on a very low life total. Pay attention to that, play your creature lands tapped as often as possible and fetch basics when you can. Sometimes it is better to fetch a surveil land in their end step and cast Fatal Push on our turn. This way we save life total, filter our draws, maybe set up some better sequence later on. I am not saying you should play as conservatively as possible at all times. Think about a few next turns and evaluate how much damage you will deal to yourself.
Mulligan decisions
Mulliganing can be challenging, as for different matchups you want different cards. For example, a hand with double Fatal Push is usually great against RW Energy, but awful against Eldrazi. And there are plenty of other cases when your decision might turn out great if you face a certain matchup, and completely unplayable if you guessed incorrectly. This is probably true for most decks to at least some extent, except perhaps the most linear combo. However there are exceptions from this rule and I will give you a couple sample hands which are great against basically any opponent. Of course, we don’t consider hands with zero, one or seven lands, as they’re more or less always a mulligan.
- Thoughtseize + reasonable curve usually works out at least decently. If you have Thoughtseize, Phelia, Ketramose or Thoughtseize, Fatal Push, Emperor you have a reasonable plan against anything. Phelia and Ketramose provide cards, maybe remove blockers. Thoughtseize might discard a powerful creature which we can reanimate with Emperor.
- Phelia/Flickerwisp + Overlord. If those cards are paired with lands to cast them, it is a keep. The value and board presence give us such a huge advantage that you almost don’t care about the rest of the hand. Maybe if the other five cards are lands and I’m on the draw, I’d consider mulliganing. If you have at least Relic of Progenitus as a turn one play or Ephemerate for later, it is already a snap keep.
- Relic + Ketramose gives a ton of value. Additional advantage of hands like this is that grave hate is good against Eldrazi, decent against Energy and not irrelevant against many other decks.
- Psychic Frog + Ketramose is another potent synergy. Without a filled graveyard, we can’t draw cards right away but usually we have some cards lying around between fetchlands, surveil lands and interaction. Once we have three cards in the graveyard to give Frog flying, we can go off. We give it flying, lose life, draw with Ketramose, attack, draw a card and get quite ahead on resources while turning on Ketramose in the process.
- Thoughtseize + Fatal Push + Relic of Progenitus + lands (including at least one fetchland) looks like an awful hand. We don’t have any pressure, how are we even winning the game? But surveil lands can filter our draw, and if necessary we can draw off of Relic. We slow our opponent with interaction and hope to draw into a threat. Our lategame is quite powerful, and we can count on that while keeping this hand.

